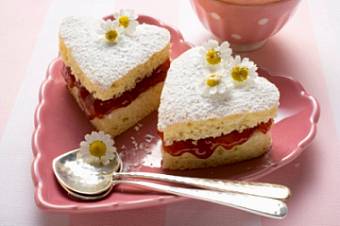
May 6, 2007 Welcome Home Bakers and Friends,I hope your are having a pleasant spring and that life is treating you good. Here in northern California where we live, the weather is very nice, not too warm yet and just a little bit of rain now and then. In May or sometimes into June we have a small amount of rainfall, but after that we don't really get any significant amounts of rain again until usually late October. So we are, as usual, expecting a very warm dry summer. By the way, we had a very nice Passover Seder dinner. We had my cousin and her husband over to our home on the first night of Passover. My husband (who is not Jewish but celebrates the Jewish holidays with me) made an unbelievable leg of lamb and served it with little roasted potatoes, carrots and parsnips. Yummy! I made a simple salad with wedges of ice berg lettuce and small grape tomatoes on the side with a "green goddess" dressing. It was just the perfect starter to our seder meal. My cousin made chopped chicken livers (I know, a lot of people don't like liver, like my husband, but the rest of us ate it spread on matzo crackers and it was delish!) I made two desserts; Passover brownies and a Chocolate Chip Banana Cake (all kosher for Passover) and we nibbled on "dark chocolate covered egg matzo's for an after dinner snack. All in all, we had a wondrous meal and a special Passover reading from the Haggadah, the Passover book that tells the story of how and why the Jews celebrate their exodus from Egypt. Even though I am Jewish, I was brought up in a very liberal Jewish home where we also celebrated Easter (at least for the kids). We had the usual Easter egg hunt in the back yard and we always enjoyed coloring the eggs for the hunt, and we were usually given Easter baskets filled with sweet goodies. Now that I'm all grown up, I still celebrate Easter and I have relatives that are Catholic so this year one of my other cousins invited us over to her home for an Easter buffet brunch which was so nice. I got to visit with all my cousins, their spouses and children and also my mother's (who passed away many years ago) sister and brother-in-law, my aunt and uncle. It was a lovely family reunion of sorts and we enjoyed it thoroughly. Our garden is really starting to look beautiful with the roses blooming and with our lovely very tall white Calla Lilies popping up everywhere right now. Some of our earlier spring plants and flowers are still around, like the irises and camellias but they will soon be on their way out for the season. Then towards the mid-summer our hydrangeas and hibiscus will be blooming. It's a very colorful sight. I think next to roses, the hydrangea is my favorite flowering plant. I have a few varieties, and I really like to watch them turn colors, from purple to blue or from white to blue. They are amazing and so gorgeous. I recently purchased some "dwarf" citrus trees for our patio, a dwarf Meyer lemon, a dwarf Bearss lime (a Tahitian type lime that is slightly smaller but very similar to the Tahitian Persian Lime and is a seedless variety), a Washington state dwarf navel orange tree and a dwarf Owari Satsuma Mandarin tree. Most of these little trees will start producing fruit in the fall or winter, but right now some of them have pretty little blossoms on them which smell wonderful. The blossoms make lovely smelling potpourri. I am so looking forward to when they produce fruit. I love all types of citrus, and most of them work so wonderfully in desserts besides flavoring savory dishes or in the case of the lemons, make great lemonade. Lastly, about my garden, I am expecting to start planting my heirloom tomatoes very soon. Also, we are planting sugar pumpkins (these are the type used for making pumpkin pie, etc., and jack o'lantern pumpkins for the autumn and Halloween and carrots (this will be a first), some regular length carrots and a smaller 3 1/2-inch variety that will work well for cutting up for salads or just cooking and eating whole since they are so small. My husband and I both love carrots so we are really looking forward to them and hoping they produce a nice crop for us. We are also trying out for the first time growing a small amount of lettuce; just one variety, a Bibb or Butter type lettuce. Wish us luck! Now on to the recipes for May and June. I have included recipes for Mother's Day (Sunday May 13th this year) and just a small assortment of other desserts that I think will be nice for spring or early summer. Oh, also a few recipe suggestions for Father's Day (Sunday, June 17th this year). Also included below is a guest submitted recipe for Cinnamon Sticky Buns submitted by Kenneth Bakke. A highly recommended recipe that would certainly work well for either Mother's Day OR Father's Day, or for that matter any time of the year. Thanks Ken. See below in the Food Tips and Information section, All about Strawberries. A useful and informative guide to buying and using this wonderful berry. Enjoy! Guest Submitted RecipeCinnamon Sticky Buns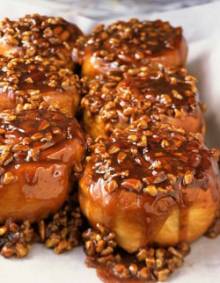 Ingredients: Dough: 1/4 cup warm water (105 degrees F - 115 degrees F/40 degrees - 46 degrees C) 1 (1/4-ounce) package active dry yeast 1/3 cup granulated sugar 3/4 cup milk 4 tbsp. (1/2 stick/2 oz./56g) unsalted butter, plus more for greasing 3 large egg yolks 1 tbsp. finely grated orange zest 1 1/4 tsp. salt 4 to 4 1/4 cups all-purpose flour, plus more for dusting Filling: 1/2 cup firmly packed light brown sugar 1 tbsp. ground cinnamon 4 tbsp. (1/2 stick/2 oz./56g) unsalted butter Topping: 3/4 cup firmly packed light brown sugar 4 tbsp. (1/2 stick/2 oz./56g) unsalted butter 3 tbsp. honey 1 tbsp. light corn syrup 1 1/2 cups (6 ounces) coarsely chopped pecans Instructions: Make the Dough: In the bowl of an electric mixer, combine warm water, yeast and 1 tsp. sugar. Stir to dissolve and let sit until foamy, about 5 minutes. Here's a good photo and description of what the yeast should look like after several minutes. Add milk, butter, remaining sugar, egg yolks, orange zest, salt and 3 cups flour. Mix on low speed until blended. Switch to a dough hook and then, again on low speed, slowly incorporate the remaining 1 cup of flour. Increase speed to medium, kneading dough until smooth and slightly sticky (adding a little more flour if too wet), 3 to 5 minutes. Shape the dough into a ball and place in a large, buttered bowl. Turn dough over in bowl to coat with the butter from the bowl. Cover the bowl with plastic wrap. Let rise in a warm place until doubled in volume, about 1 hour (or 2 hours if not in an entirely warm place). After the dough has risen, punch down. Turn out onto a lightly floured cutting board and let sit 20 minutes. Make the Filling: Combine brown sugar and cinnamon in a small bowl. Melt butter; keep separate. Roll dough out into a 12 x 18-inch rectangle. Brush with melted butter and sprinkle with cinnamon-sugar mixture. Starting with the long side, roll dough into a cylinder. Place seam side down on a flat surface and cut crosswise into 15 slices. Make the Topping: In a 1-quart saucepan, combine brown sugar, butter, honey and corn syrup over low heat; stir until sugar and butter are melted. Pour mixture into a greased 9 x 13-inch pan and sprinkle pecans on top. Place dough slices, flat side down, on top of prepared topping. Crowd them so they touch. Cover with plastic wrap, leaving room for the buns to rise, and refrigerate overnight. Preheat oven to 375 degrees F/190 degrees C. Remove the rolls from the refrigerator and let stand at room temperature while the oven preheats. Bake buns until golden, 30 to 35 minutes. Remove pan from oven and immediately (and carefully as not to spill hot topping on your toes!) invert onto a serving tray or baking dish. Let buns cool slightly and serve warm. Makes 12 buns. Source: Recipe adapted from elise.com Submitted By: Kenneth Bakke Date: April 8, 2007 Click here to view recipe and photo of Cinnamon Sticky Buns on Diana's Desserts Website Mother's Day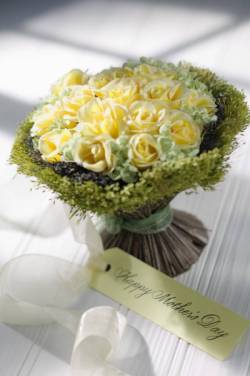 Fresh Strawberry Layer Cake Servings: 12-16 Comments: Well, all I can say is "this cake is to die for". I am not kidding. Although it's made with a cake mix, this is a very very delicious and special cake. I am sure it's the sour cream added to the mix which makes it especially moist and tender. Strawberry layer cake has always been (next to chocolate layer cake with chocolate frosting) my favorite cake since I was a child. The combination of the sweetened strawberries and the sweetened whipped cream (this time I sweetened the whipped cream with confectioners' sugar and I definitely liked it better then using regular granulated sugar, much more velvety and smooth) sandwiched between luscious moist yellow cake works for me! Make this fantastic cake for Mother's Day. She will love love love you for it. I guarantee it! And, by the way, white cake mix works very nicely also if you choose to use it instead. Ingredients: For Cake: 1 (18.25 oz.) box yellow or white cake mix (not with pudding in the mix) 1 cup sour cream 4 eggs, beaten 1/3 cup vegetable oil 1/4 cup water For Filling and Frosting: 2 cups heavy cream (keep chilled until ready to whip) 3/4 cup granulated sugar 3 cups thinly sliced fresh strawberries 1/2 cup granulated or confectioners' sugar (for tossing with sliced strawberries) Garnish: 6 - 8 large fresh strawberries cut in half, for decorating top of cake Instructions: 1. Preheat oven to 325 degrees F/160 degrees C. Grease and flour two 8 or 9-inch round cake pans OR alternately spray pans with non-stick baking spray with flour, then line bottom of pans with parchment paper and spray paper also. 2. Place bowl and beaters or wire whisk that you are going to whip cream with for filling and frosting the cake in the freezer to chill. 3. In a medium size bowl toss the strawberries with the 1/2 cup sugar and place in refrigerator to let flavors combine. 4. For Cake: Combine all cake ingredients in bowl of an electric mixer and beat for thirty seconds on low speed, then beat two minutes on medium speed. Divide batter evenly between prepared pans. Bake in preheated oven for 25 to 30 minutes, until a cake tester inserted in center comes out clean. Place cake pans on cooling racks. Let cool in pans for 10 to 15 minutes. Remove cakes from pans (remove parchment paper, if used) and let cakes cool completely before filling and frosting. 5. For Whipped Cream Filling and Frosting: Remove chilled bowl and beaters from freezer. Take chilled heavy cream out of refrigerator. Combine cream and the 3/4 cup sugar in chilled bowl. Using an electric mixer, beat cream and sugar until soft peaks form (soft peaks are when the whipped cream curls over (not standing straight up) from the beaters or whisk when lifted). 6. To Assemble Cake: Place one cake layer, rounded side down, on serving plate. Spread with 1/2 to 1 cup whipped cream; arrange sliced strawberries evenly on top. Top with second cake layer, rounded side up. Frost sides and top of cake with remaining whipped cream. Just before serving, garnish with strawberry halves. Store cake loosely covered in refrigerator. Makes 12-16 servings. Photograph taken by Diana Baker Woodall © 2007 Source: DianasDesserts.com Click here to view recipe and photo of Fresh Strawberry Layer Cake on Diana's Desserts Website Banoffee Trifle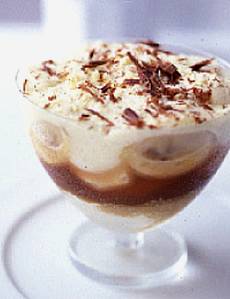 Servings: 8 Comments: This indulgent pudding uses ready-made dulce de leche and ready-made vanilla pudding (or vanilla custard) and is so simple to put together. The trifle can be made 6 hours before serving. A lovely dessert for any special occasion or for a beautiful dessert to end a holiday meal. Ingredients: 1 (10.75 oz.) ready-made pound cake (such as Sara Lee or Entenmanns) 2 tablespoons Tia Maria liqueur 1 (12 to 15 oz.) jar dulce de leche (Dulce de leche can be found in some supermarkets or gourmet food stores. It can also be purchased at many online stores) 4-5 ripe bananas 1 cup (8 oz./236ml) heavy cream or double cream 1 cup ready-made vanilla pudding or vanilla custard 3 1/2 oz. (100g) dark chocolate Special bowl: You will need a 9 or 10-inch in diameter clear glass bowl that is at least 5-7 inches deep, such as a trifle bowl. Instructions: Tear the pound cake into pieces and use them to line the bottom of a large clear glass serving bowl. Spoon over the Tia Maria so that the pound cake pieces are thoroughly soaked. Spoon the dulce de leche over the pound cake pieces, then slice the bananas and scatter them over the dulce de leche. Whip the cream to soft peaks. Fold half of the whipped cream into the vanilla pudding (or custard, if using). Spread the pudding (or custard) mixture on top of the bananas, to the edge of the bowl, using the back of a spoon, then top with the remaining whipped cream. Refrigerate until ready to serve. Right before serving grate the chocolate over the top of trifle. Store any uneaten trifle covered in the refrigerator. Makes 8 servings. Source: Home and Gardens Click here to view recipe and photo of Banoffee Trifle on Diana's Desserts Website Fresh Coconut Cake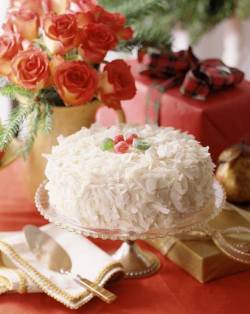 Servings: 8 Comments: A lovely cake to serve on Mother's Day. Makes a beautiful presentation. Ingredients: 3 1/2 cups cake flour, sifted twice 4 tsp. baking powder 1/2 tsp. salt 16 tbsp. (2 sticks/8 oz/226g) unsalted butter 3 1/2 cups granulated sugar 1 cup milk 2 tsp. vanilla extract 1/2 tsp. coconut extract 10 egg whites 5 tbsp. cold water 1/2 tsp. cream of tartar 1 to 1/2 tsp. light corn syrup 2 1/2 cups coarsely grated fresh coconut Instructions: Have all ingredients at room temperature. Position a rack in the center of an oven and preheat to 350 degrees F (180 degrees C). Butter and flour two 9-inch round cake pans. In a large bowl, sift together the flour, baking powder and salt. In the bowl of an electric mixer, beat the butter on high speed until creamy, 4 to 5 minutes. Gradually add 2 cups of the sugar and continue beating, scraping down the sides of the bowl, until light and fluffy, 4 to 5 minutes more. Reduce speed to low. Fold the flour mixture into the butter in three parts, alternating with the milk, until smooth. Fold in 1 tsp. of the vanilla and the coconut extract. In a large, clean bowl, beat 8 of the egg whites with a whisk to stiff peaks. Fold 1/2 cup whites into the batter until blended, then fold in the remaining whites. Divide the batter among the prepared pans. Bake until golden and a toothpick inserted into the centers comes out clean, 30 to 35 minutes. Cool to room temperature. In a heatproof bowl, combine the remaining 2 egg whites, the remaining 1 1/2 cups sugar, the water, cream of tartar and corn syrup. In a bowl set over a pan of simmering water but not touching the water, beat the mixture until thick, shiny and double in volume, about 7 minutes. Remove from heat; add the remaining 1 tsp. vanilla and beat until the icing is thick enough to spread, 2 to 3 minutes more. In a small bowl, combine 1 cup icing and 1 1/2 cups of the coconut; stir to mix. Set 1 cake on a plate, spread the icing evenly over the top and set the other cake on top. Working from top to bottom, spread on the remaining plain icing. Pat the remaining coconut evenly onto the sides and top. Makes 10-12 servings. Click here to view recipe and photo for Fresh Coconut Cake on Diana's Desserts Website Vanilla Jelly Roll with Berry Filling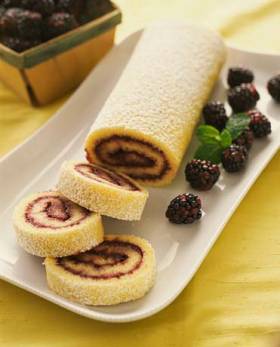 Servings: 10 Comments: What is a Jelly Roll? Known since the mid-1800s, jelly rolls are cakes made of a thin sheet of sponge cake, spread with jam or jelly (and sometimes whipped cream or frosting) and rolled up. This type of cake is traditionally sprinkled with confectioners' sugar, rather than being frosted. When cut, jelly rolls have an attractive pinwheel design. The British term for jelly roll is Swiss roll. What is a Jelly Roll or Swiss Roll Pan? A rectangular baking pan with about 1-inch-deep sides used to make sheet cakes or sponge cakes used for jelly rolls. These pans are usually 15 x 10 x 1- inch (38cm x 25cm x 2.5cm); however there is a smaller pan measuring 12 x 7 x 3/4-inch and a larger one measuring 17 x 11 x 1-inch. Ingredients: 4 eggs 1/2 cup all-purpose flour 1 teaspoon baking powder 1/2 teaspoon vanilla extract 1/3 cup granulated sugar 1/2 cup granulated sugar Sifted confectioners' sugar 1/2 cup jelly or jam (any berry jam or jelly is recommended, such as blackberry, strawberry, raspberry or other jam or jelly of your choice) Instructions: 1. Preheat oven to 375 degrees F/190 degrees C. Grease and lightly flour a 15 x 10 x 1-inch (38cm x 25cm x 2.5cm) jelly roll (swiss roll tin) pan. 2. Separate eggs. Allow egg whites and yolks to stand at room temperature for 30 minutes. Stir together flour and baking powder; set aside. 3. In a medium mixing bowl beat egg yolks and vanilla with an electric mixer on high speed for 5 minutes or until thick and lemon colored. Gradually add the 1/3 cup granulated sugar, beating on high speed until sugar is almost dissolved. 4. Thoroughly wash the beaters. In another bowl beat egg whites on medium speed until soft peaks form (tips curl). Gradually add the 1/2 cup granulated sugar, beating until stiff peaks form (tips stand straight). Fold egg yolk mixture into beaten egg whites. Sprinkle flour mixture over egg mixture; fold in gently just until combined. Spread batter evenly in the prepared pan. 5. Bake in preheated oven for 12 to 15 minutes or until cake springs back when lightly touched. Immediately loosen edges of cake from pan and turn cake out onto a towel sprinkled with confectioners' sugar. Roll up towel and cake into a spiral starting from one of the cake's short sides. Cool on a wire rack. Unroll cake; remove towel. Spread cake with jelly or jam to within 1 inch of edges. Roll up cake. Makes 10 servings. Click here to view recipe and photo of Vanilla Jelly Roll with Berry Filling on Diana's Desserts Website Little Strawberry Heart Shaped Cakes Servings: Makes 6-8 cakes Comments: For a special treat make these sweet little heart shaped strawberry filled cakes for Mother's Day. They would also be nice served for Valentine's Day or at an afternoon tea. Ingredients: For Cakes: 1 (18.25 oz.) box yellow cake mix 1 cup sour cream 4 eggs, beaten 1/3 cup vegetable oil 1/4 cup water For Filling: 2 1/2 cups fresh strawberries, diced into small pieces 1/4 cups sugar 1/2 cup water 2 tsp. cornstarch Garnish: Confectioners' sugar, for dusting tops of cakes Edible flowers, for decoration (optional) Serve with: Whipped cream or non-dairy whipped topping Instructions: 1. Crush 1/2 cup of the strawberries; add water; cook 2 minutes; sieve. Mix sugar and cornstarch; gradually stir into strawberry sauce. Cook, and stir until thick and clear. Cool slightly; pour over remaining sliced strawberries. Cool to room temperature and use as cake filling for heart shaped cakes. 2. Preheat oven to 325 degrees F/160 degrees C. Grease and flour two 8 or 9-inch round cake pans OR alternately spray pans with non-stick baking spray with flour, then line bottom of pans with parchment paper and spray paper also. 3. Combine all cake ingredients in bowl of an electric mixer and beat for thirty seconds on low speed, then beat two minutes on medium speed. Divide batter evenly between prepared pans. Bake in preheated oven for 25 to 30 minutes, until a cake tester inserted in center comes out clean. Place cake pans on cooling racks. Let cool in pans for 10 to 15 minutes. Remove cakes from pans (remove parchment paper, if used) and let cakes cool completely before filling with strawberries and sauce. 4. Once cakes have cooled completely, using a 2 1/2-inch to 3-inch heart shaped cookie cutter, cut out heart shaped slices of cake from both cake layers. Spread strawberries with sauce on one side of each heart shaped cake, then sandwich with another heart shaped cake. Repeat with remaining heart shaped cakes. Place cakes on serving plates. Heavily dust tops of cakes with confectioners' sugar and place edible flower on each cake for garnish, if desired. Serve cakes with whipped cream or non-dairy whipped topping. Store any uneaten cakes in the refrigerator, wrapped tightly in plastic wrap. Note: You may have extra strawberries and sauce left over. Store in refrigerator for another use. Makes approximately 6-8 heart shaped strawberry cakes. Source: DianasDesserts.com Click here to view recipe and photo of Little Strawberry Heart Cakes on Diana's Desserts Website A Few Recipes for Spring and Summer Juneteenth Day Jelly Cake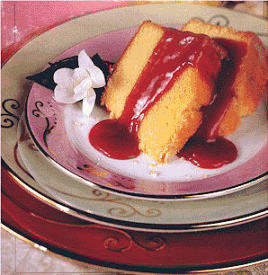 Comments: Juneteenth Day is the oldest nationally celebrated commemoration of the ending of slavery in the United States. From its Galveston, Texas origin in 1865, the observance of June 19th as the African American Emancipation Day has spread across the United States and beyond. Today Juneteenth commemorates African American freedom and emphasizes education and achievement. It is a day, a week, and in some areas a month marked with celebrations, guest speakers, picnics and family gatherings. It is a time for reflection and rejoicing. It is a time for assessment, self-improvement and for planning the future. Its growing popularity signifies a level of maturity and dignity in America long over due. In cities across the country, people of all races, nationalities and religions are joining hands to truthfully acknowledge a period in our history that shaped and continues to influence our society today. Sensitized to the conditions and experiences of others, only then can we make significant and lasting improvements in our society. Servings: 12 Comments: A jelly cake certainly isn't a high-style dessert, but it's an old traditional delight that always seems to make a regal finish to a good soul food dinner. Ingredients: 1 cup granulated sugar 1/2 cup mashed banana 2-1/2 cups all-purpose flour 1 tsp. baking powder 2 tsp. vanilla extract 6 egg whites Nonstick cooking spray 1/2 cup raspberry jam, preserves or jelly or Raspberry Sugar Syrup* (see recipe below) Instructions: For the Cake Preheat oven to 350 degrees F (180 C). Spray a 10-inch tube or bundt pan with nonstick cooking spray. Set aside. In a large bowl, cream the sugar and banana with an electric mixer. Then, slowly mix in the flour, baking powder and vanilla extract. Mix in the egg whites, one at a time. Pour the cake batter into the prepared 10-inch tube or bundt pan. Bake about 1 hour or until a toothpick inserted in center comes out clean. Let cool for 20 minutes on wire rack, then remove the cake from the pan. Serve with Raspberry Topping or Raspberry Sugar Syrup. Makes 12 servings. Raspberry Topping In a saucepan over low heat, heat the jam, preserves or jelly until melted enough to pour, stirring constantly, about one minute. Drizzle over the cake, or place sauce into a pretty bowl and let guests help themselves to the topping. Raspberry Sugar Syrup Ingredients 1/4 cup fresh raspberries 1/4 cup granulated sugar 1/4 cup water Instructions Blend or process raspberries until almost smooth, pass through a small sieve to remove seeds. Combine sifted raspberry puree, sugar and the water in a small saucepan. Simmer, stirring without boiling, until sugar is dissolved. Boil gently for 3 minutes or until syrup is slightly thickened. Drizzle over cake or place in a pretty bowl and let guests serve themselves. Source: Recipe is adapted from The New Soul Food Cookbook by Wilbert Jones. I have renamed this recipe (from the cookbook) from Jelly Cake to Juneteenth Day Jelly Cake for the purpose of using it for this special African-American holiday. Click here to view recipe and photo of Juneteenth Day Jelly Cake on Diana's Desserts Website Lemon Blueberry Charlotte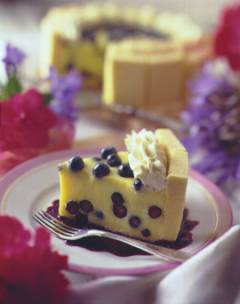 Servings: Makes 8 servings and 1 cup sauce Comments: What is a Charlotte? Definition: [SHAR-luht] This classic molded dessert begins with a mold lined with sponge cake, pound cake, ladyfingers or buttered bread. The traditional charlotte container is pail-shaped, but almost any mold is acceptable. The lined mold is then filled with layers (or a mixture) of fruit and custard or whipped cream that has been fortified with gelatin. The dessert is chilled thoroughly and unmolded before serving. Charlotte russe, said to have been created for the Russian Czar Alexander, is a ladyfinger shell filled with the ethereal bavarian cream, and decorated elaborately with whipped-cream rosettes. The classic apple charlotte is a buttered-bread shell filled with spiced, sautéed apples. Unlike other charlottes, this one is baked and served hot. Source: The New Food Lover's Companion, Second Edition, by Sharon Tyler Herbst What a delightful dessert to have during the warmer summer months. A sweet and tasty "no bake" blueberry dessert to serve as a simple (but elegant looking) dish for your family or friends, or serve as a light dessert with brunch or after dining "al fresco" (outdoors). Ingredients: 2 (3 oz.) packages lemon flavored gelatin 2 cups fresh blueberries, divided 1-1/2 cups plain yogurt (regular or low-fat) 1 (14 to 16 oz.) store-bought ready-made pound cake (such as Sara Lee or Entenmann's) Blueberry Honey Sauce (see recipe below) (optional) Whipped Cream, (optional) Instructions: In a large bowl, combine lemon gelatin with 2 cups boiling water, stirring constantly until completely dissolved, about 2 minutes. Stir in 1-1/2 cups of the blueberries and the yogurt until smooth. Cut cake into 14 (1/2-inch) slices (you may have some pound cake left over which you can save for another day). Cut each slice into 3-inch x 1-inch rectangles. Arrange rectangles upright around edge of an 8-inch springform pan; arrange remaining pieces to cover bottom of pan. Spoon in blueberry-yogurt filling. Scatter remaining 1/2 cup blueberries over top. If desired you may pipe whipped cream around edges of charlotte. Cover; chill until firm, about 2 hours. Serve with Blueberry Honey Sauce (optional). BLUEBERRY HONEY SAUCE Ingredients: 1/2 cup honey 1/4 teaspoon ground ginger 1 cup fresh blueberries 2 tablespoons fresh lemon juice Instructions: In a small saucepan, combine honey and ginger; bring to a boil. Stir in blueberries; return to a boil. Remove from heat; stir in lemon juice. Transfer mixture to a blender container and whirl until smooth. Serve over charlotte or spoon over cut-up fruits. Makes 1 cup sauce. Makes 8 servings plus 1 cup sauce. Source: The Internet Click here to view recipe and photo of Lemon Blueberry Charlotte on Diana's Desserts Website Tropical Fruit Salad with Toasted Coconut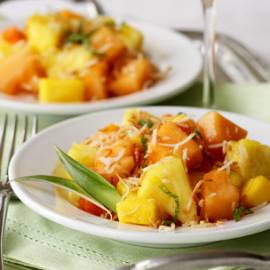 Servings: 6-8 Comments: This colorful fruit salad is excellent served alone or with a big dollop of your favorite yogurt spooned on each portion. Try flavors like piña colada, vanilla or pineapple to jazz up the fruit. Ingredients: 1/2 cup shredded coconut 1 ripe pineapple, peeled, cored and cut into 1/2-inch chunks 1 ripe papaya, peeled, seeded and cut into 1/2-inch chunks 1 ripe cantaloupe, peeled, seeded and cut into 1/2-inch chunks 1 ripe mango, peeled, pitted and cut into 1/2-inch chunks 6 fresh mint leaves Instructions: Preheat oven to 350 degrees F/180 degrees C. To Toast Coconut Spread the coconut on a baking sheet and toast in the oven until golden, about 5 minutes. Set aside to cool. To Make Salad In a large bowl, combine the pineapple, papaya, cantaloupe and mango. Cover and refrigerate until ready to serve. Just before serving, sprinkle with the toasted coconut and spoon onto small plates. Garnish with the mint leaves. Makes 6-8 servings. Source: Adapted from Williams-Sonoma Outdoors Series, Picnics and Tailgates, by Diane Rossen Worthington (Time-Life Books, 1998). Click here to view recipe and photo of Tropical Fruit Salad with Toasted Coconut on Diana's Desserts Website Sweet & Tart Rhubarb-Pineapple Crumble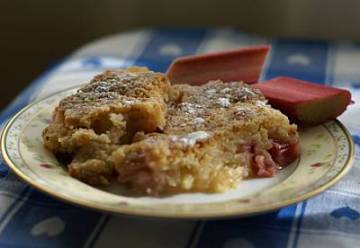 Servings: 6-8 Comments: What is a Crumble? A crumble is a dish of British origin containing fresh or stewed fruit topped with a crumbly mixture of fat (usually butter), flour, and sugar. The crumble is baked in an oven until the topping is crisp. It is often served with custard, cream or ice cream as a hearty, warm dessert after a meal. Popular fruits used in crumbles include apple, blackberry, peach, rhubarb, gooseberry and plum. The topping may also include rolled oats, ground almonds or other nuts, and sometimes sour milk (e.g. vinegar and milk) is added to give the crumble a more extravagant taste. Brown sugar is often sprinkled over the crumble topping, which caramelizes slightly when the pudding is baked. In some recipes the topping is made from broken biscuits (cookies in American English) or even breakfast cereals, but this is not traditional. Crumbles originated in Britain during World War II. Due to strict rationing: the ingredients required to make the bases of pies contained too much of the necessary flour, fat and sugar to make the pastry. So a simple mixture of flour, margarine and sugar was used to make the top of the crumble. The dish was also popular due to its simplicity, as it allowed women more time to do other tasks. In some parts of America a very similar dish may be called a crisp. It is also similar to a fruit cobbler (popular in the USA), although the topping for a cobbler is generally smoother and less crumbly. Source: Wikipedia.com What is Rhubarb? Rhubarb, which looks like a pink celery stalk, is botanically a vegetable, but it is used as a fruit, largely in pies and sauces. (In some areas, it is referred to as "pie plant.") The ancient Chinese cultivated the plant for its roots, which reputedly have medicinal properties, and it didn't gain acceptance as a food in the United States until the late 1700s. The roots and leaves aren't eaten; indeed, the leaves are highly poisonous. At one time, the toxicity was attributed to their exceedingly high levels of oxalic acid, a substance that can interfere with iron and calcium absorption. However, the exact source of the leaf toxin has yet to be determined, since rhubarb stalks also contain significant amounts of oxalic acid (as do a few other foods, such as spinach). Rhubarb stalks are extremely tart and they require sweetening to make them appetizing. This can increase their Calorie content considerably. For example, a typical recipe for rhubarb pie calls for 4 cups of diced rhubarb to which 1 1/4 cups of sugar are added. This converts 104 calories' worth of rhubarb to more than 1,000 calories. An alternative to this is to sweeten rhubarb with other, sweeter fruits, such as apples. Field-grown rhubarb appears on the market from April through June or July. Hothouse rhubarb, which is cultivated in California, Oregon, and Michigan, is mainly harvested from January through June. Rhubarb is also available frozen. Note: In this version of a crumble, I have added a batter to be poured over the fruit, then the topping mixture is sprinkled over the batter. It's a little bit richer then most crumbles, but really not too much different in taste. I think you'll like it.....Diana, Diana's Desserts Ingredients: For the Fruit: 2 cups rhubarb, cut into 1-inch cubes 1 cup (or 8-ounce can) crushed pineapple, drained For Batter: 1 egg, beaten 1 cup granulated sugar 2 tbsp. self-rising flour 2 tbsp. lemon juice For Topping: 1 cup self-rising flour 1/2 cup granulated sugar 1/2 cup (1 stick/4 oz./113g) butter, softened Confectioners' sugar, for dusting top (optional) Serve with: Whipped cream, vanilla ice cream or vanilla sauce (see recipe below) Instructions: For the Topping: Combine all topping ingredients in a small bowl and mix with a fork or pastry blender until the mixture resembles coarse meal. Set aside. Preheat oven to 350 degrees F/180 degrees C. Lightly grease or spray with non-stick cooking spray a 9-inch square or round baking dish (ceramic or glass baking dish is best). For the Fruit: Place rhubarb cubes in bottom of prepared baking dish and spread crushed pineapple over the rhubarb. For the Batter: Combine batter ingredients in a small bowl and mix well. Pour batter over fruit mixture. Sprinkle with topping mixture. Bake crumble in preheated oven for 50-55 minutes. Remove from oven and transfer dish to cooling rack. Let cool, then dust with confectioners' sugar (optional). Serve while still a bit warm or at room temperature. If desired, serve with whipped cream, vanilla ice cream or vanilla sauce (see recipe for Vanilla Sauce below). Crumble may be refrigerated for up to 2 days or can be wrapped well, and frozen. Tip: Cut crumble with a knife, then spoon out onto serving plates with a large spoon or spatula. Makes 6-8 servings. Vanilla Sauce Ingredients: 1/2 cup (1 stick/4 oz./113g) butter 1/2 cup granulated sugar 1/2 cup firmly packed brown sugar 1/2 cup heavy whipping cream or double cream 1 tablespoon vanilla extract Instructions: Combine all sauce ingredients except vanilla in 1-quart saucepan. Cook over medium heat, stirring occasionally, until mixture thickens and comes to a full boil (5 to 8 minutes). Stir in vanilla. Spoon over pudding. Photograph taken by Diana Baker Woodall © 2007 Source: DianasDesserts.com Click here to view recipe and photo of Sweet & Tart Rhubarb-Pineapple Crumble Father's Day Key Lime Pie Martini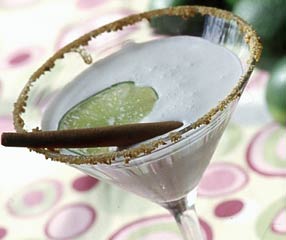 Servings: 1 Comments: Like drinking your slice of Key Lime Pie. So refreshing and so tasty, and if Dad likes a cocktail once in a while, he's sure to want to try this one you made especially for his special day. Ingredients: 4 tablespoons vanilla flavored vodka 2 tablespoons Key lime juice 2 tablespoons simple syrup 1/3 cup heavy cream 1/2 cup ice Graham cracker crumbs Honey Cinnamon stick Lime wedge Instructions: Line the rim of a martini glass with honey and dip into graham cracker crumbs, coating the rim with crumbs. Combine first 5 ingredients in a martini shaker. Shake well until very cold. Strain into martini glass. Garnish with cinnamon stick and lime wedge. Makes 1 serving. Nick Phillips Coastal Living, April 2006 Source: Coastal Living, April 2006 Click here to view recipe and photo of Key Lime Pie Martini on Diana's Desserts Website Chocolate Chip Cheesecake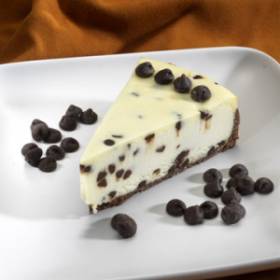 Servings: 12 Comments: This dessert is like fine wine. The longer it sits, the better it tastes (in the fridge, of course). Ingredients: For the Crust: 1/4 cup butter, melted 18 Oreo cookies, crushed into crumbs For the Filling: 3 (8 oz. each) packages of cream cheese, softened 1 can Eagle Brand Sweetened Condensed Milk (or any other brand of sweetened condensed milk) 3 eggs 2 teaspoons vanilla extract 1 cup mini chocolate chips 1 teaspoon all-purpose flour Instructions: Crust: Combine butter and Oreo crumbs. Press into bottom of a 9-inch spring form pan. Filling: In a large mixing bowl, beat cream cheese until fluffy. Add sweetened condensed milk and beat until smooth. Add eggs and vanilla; mix well. In a small bowl toss 1/2 cup mini chocolate chips with the teaspoon of flour. Stir into cheese mixture. Pour over crust. Sprinkle the remainder of the chocolate chips over top. Bake for one hour at 300 degrees F (150 C). Bring to room temperature and then chill before serving. Makes 12 servings. Submitted By: Sugar Cookie Date: September 16, 2003 Click here to view recipe and photo of Chocolate Chip Cheesecake on Diana's Desserts Website Belgian Waffles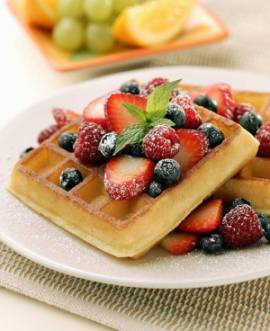 Servings: Makes 6-8 waffles Comments: Belgian waffles are delicious topped with fresh berries or other fresh fruit such as peaches, nectarines, or bananas. Also great with maple syrup and butter. For an extra tasty treat, spoon a dollop of whipped cream or non-dairy whipped topping over waffles. Serve these wonderful waffles for a special Father's Day brunch, if desired. Ingredients: 2 eggs (or 1/2 cup egg substitute) 1 3/4 cups milk 1/2 cup vegetable oil 2 cups all-purpose flour 4 tsp. baking powder 1 tbsp. granulated sugar Instructions: 1. Preheat waffle iron. 2. Place eggs in a large mixing bowl and beat with electric mixer for about 30 seconds until fluffy. 3. Beat in remaining ingredients just until smooth. 4. Spray both top and bottom plates of waffle iron with nonstick cooking spray before pouring in batter for first waffle (more may be needed for the rest of waffles). If using Egg Substitute then you will need to spray with nonstick cooking spray for each waffle. 5. Using a liquid measuring cup, pour 1/2 cup batter onto center of waffle iron. If needed spread batter out on waffle grid with a rubber spatula. Close waffle lid, and let waffle cook according to manufacturers instructions. This batter makes about 4 cups, enough for about 6-8 (7-inch) waffles. 6. Wait until waffle iron stops steaming. Most waffle irons should have a light that goes off once waffle is cooked. The first waffle is frequently not as brown and crisp as the rest. 7. This batter keeps, covered, in the refrigerator for about 4 days so you can make fresh waffles each day. 8. Serve waffles with butter, maple syrup, thawed frozen berries or fresh berries, whipped cream, or non-dairy whipped topping. Tip: Keep waffles warm on a baking sheet in a 200 degree F/100 degree C oven until ready to serve. Note: Egg substitute produces a lighter, crisper waffle but it is necessary to spray top and bottom surfaces of waffle iron before more batter is poured on for each waffle, otherwise waffles will stick. This is because of the absence of fat from the whole egg. Makes 6-8 waffles. Click here to view recipe and photo of Belgian Waffles on Diana's Desserts Website Food Tips and Information SectionAll About Strawberries These plump, sweet, ruby like berries are nutritional jewels: Rich in dietary fiber and offering good amounts of Vitamin C (more than any other berry) and manganese, strawberries are also an excellent source of ellagic acid, a phytochemical that helps combat carcinogens. They are also a good source of Antioxidant flavonoids, such as anthocynanins. When the USDA analyzed a variety of fruits to rate their antioxidant power, strawberries came in second (blueberries were first). The strawberry is technically a "false" fruit because it grows from the base rather than from the ovary of a flower, and so is not a true berry. Varieties Some 70 varieties are produced commercially, mostly in California and Florida (though strawberries are grown in all 50 states). Some of the dominant California varieties are the Pajaro and the Chandler. Day neutrals: The recently introduced "day neutral" varieties, such as Tristar, which are usually grown on a smaller scale because of their labor-intensive cultivation, means a more constant supply of well-flavored berries throughout the season,: These varieties bloom all summer, so that Eastern growers can extend their harvest period to nearly the length of the California season. The fruits are smaller than California berries, but good and sweet. Wild strawberries: Wild strawberries, or fraises des bois, are now cultivated to a small extent in California. These thumbnail-size berries are prized for their intense flavor. If you're a good forager, you may find an overlooked patch of these tiny strawberries growing in a pasture or meadow in midsummer. Availability Strawberries are the most popular as well as the most plentiful berry: They are available year-round, with greatest abundance from April through July, when the California crops are at their peak. Availability diminishes significantly from October through January, although imported berries, from Mexico and New Zealand, augment the supply. Local strawberries are available at farms, farmers' markets, and often at supermarkets when they are in season. Shopping For best flavor, buy strawberries when they're in season where you live; they'll undoubtedly be riper and tastier than berries that have been transported in from distant regions. Also, the closer the berries are to the market, the less damage they're likely to suffer in transit. Choose strawberries very carefully; they are often packed in opaque boxes that may conceal inferior fruit beneath a display of perfect specimens on top. If the box is cellophane wrapped, your best bet is to examine the berries you can see, and check the box for dampness or stains, which indicate that the fruit below may be decaying. If the box is not wrapped, you can remove a few of the top berries and peek beneath. Check, too, for twigs or other debris (there shouldn't be any). Strawberries should be plump, dry, firm, well shaped and uniformly colored. Don't purchase berries that are withered or crushed. The berries themselves should be a true, rich red (although the shade of red differs among varieties). Pale, greenish, or yellowish fruit is unripe and will be hard and sour. The leafy caps should look fresh and green. Storage Strawberries are highly perishable; they can turn soft, mushy, and moldy within 24 hours. When you bring home a box of berries, turn it out and check the fruit. Remove any soft, overripe strawberries for immediate consumption; discard any smashed or moldy berries and gently blot the remainder dry with a paper towel. Return the berries to the box, or, better yet, spread them on a shallow plate or pan and cover with paper towels, then with plastic wrap. Freezing: Strawberries freeze well, allowing you to enjoy them practically year round. You can buy prepackaged frozen berries, but these may have had sweetener added, which can double their Calorie content. Freezing strawberries yourself is simple. Pick over the berries, then spread them out in a single layer in a jelly-roll pan. Place the unwashed berries in the freezer until they are solidly frozen, and then transfer them to a heavy plastic bag. They'll keep for 10 months to a year. Preparation Pick over strawberries, discarding any bad ones. Keep the caps of strawberries intact until after they're rinsed and drained, as the opening left by the removal of the cap will allow the berries to absorb water. Rinse the fruit, drain, and gently pat dry. Use your fingers, a paring knife, or a pincer like strawberry huller to take off the caps and the white "hull," which is sort of like the strawberry's core. Frozen berries need not be thawed before using them in recipes, but extra cooking time may be necessary. Commercially frozen berries do not require washing, but home-frozen berries--which should not have been washed previously--should be quickly rinsed under cold water. Nutrition Chart Strawberries/1 cup whole Calories: 43 Total Fat (g): 0.5 Saturated fat (g): 0 Monounsaturated fat (g): 0.1 Polyunsaturated fat (g): 0.3 Dietary fiber (g): 3.3 Protein (g): 1 Carbohydrate (g): 10 Cholesterol (mg): 0 Sodium (mg): 1 Vitamin C (mg): 82 Manganese (mg): 0.4 Source: WholeHealthMD.com Strawberry Mousse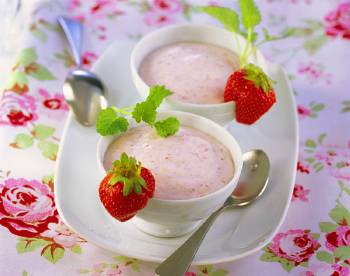 Servings: Makes 8 (1/2 cup) servings Comments: This is such a quick and easy dessert to prepare and makes a lovely presentation. Garnish each serving with whipped cream, one whole strawberry and a mint sprig, if desired. Ingredients: 1 small container (approximately 8 ounces/250 grams) fresh strawberries, rinsed and hulled and cut into halves 1 cup granulated sugar 1 tablespoon water 1 teaspoon unflavored powdered gelatin 2 cups heavy cream, whipped Garnish (optional): Extra whole strawberries Whipped cream or non-dairy whipped topping Mint sprigs Instructions: Place the strawberries in a medium saucepan, add the sugar and water and cook over medium–low heat. Stir gently until the sugar has dissolved. Simmer for 10 minutes or until the strawberries are soft and the liquid syrupy. Process the strawberry mixture and gelatin in a food processor until smooth. Set aside to cool. Fold through the cream. Pour into 8 (1/2 cup) serving glasses or cups and refrigerate for 30 minutes or until set. Garnish each serving with a dollop of whipped cream or non-dairy whipped topping, a strawberry and a mint sprig, if desired. Makes 8 servings. Source: DianasDesserts.com Click here to view recipe and photo of Strawberry Mousse on Diana's Desserts Website Until Next TimeHopefully I have given you several choices for delicious dessert recipe ideas for Mother's Day, Father's Day, Juneteenth Day and just for spring and summer in general. Please let me know if you made any of these desserts (or Key Lime Pie Martini) and how it turned out.I will be back in late July or late August with recipes for late summer goodies and "back to school" treats for the kids. I look forward to hearing from you with your comments, whether positive or negative about my website, the recipes, etc., so please keep in touch. Just click on the "Contact Diana" link on the navigation bar on any page of my website and drop me a line. Take care and enjoy the rest of Spring and if you'd like to submit one of your favorite dessert, bread or beverage recipes to Diana's Dessert Website, click on the link below or click on the Submit Recipe link on my website. Submit a Recipe Sincerely, Diana Diana's Desserts Diana's Desserts
A Website Dedicated to Home Bakers http://www.dianasdesserts.com E-mail Address: diana@dianasdesserts.com |

