|
May 1, 2005
Welcome Home Bakers and Friends,
I hope all of you had a great month of April, the first full month of Spring, and that those of you who celebrated the Jewish holiday of Passover, enjoyed yourselves and that your desserts turned out very nice for your Seder meal.
This month I will be sharing with you some very nice recipes for Cinco de Mayo, Mother's Day and a couple of recipes to enjoy for Memorial Day at the end of this month.
A Guest Submitted Recipe is also included, and for May, the recipe is for Orange Chiffon Cake, submitted by Bea. A lovely cake to serve for Mother's Day, an afternoon tea or for a light after dinner dessert.
The Food Tips and Information Section this month is all about Limes, a fruit that is rarely eaten on it's own, but what great flavor it gives to so many dishes, and limes are also a great source of Vitamin C. A wonderful recipe for a Lime Custard Tart follows the section below on Limes.
The Tips Section this month is about being a better cake baker. A few simple tips on Cake making and serving.
Enjoy!
Guest Submitted Recipe
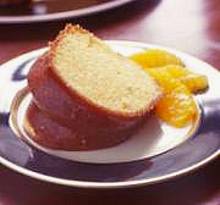
Orange Chiffon Cake
Servings: 12
Comments:
This would be a lovely cake to make for Mother's Day. It is sure to be a dessert she'll remember for years to come; quite easy to make, yet very delicious.
Ingredients:
For The Cake:
2 oz. (1/4 cup) water
2 1/2 oz. (1/2 cup) vegetable oil
2 oz. (1/2 cup) superfine flour OR cake flour
1/8 tsp. baking powder (or bicarbonate of soda)
4 oz. (1 1/4 cups) all-purpose flour (plain flour)
4 egg yolks
1 tsp. orange food coloring (paste or liquid)
4 egg whites
1/2 tsp. cream of tartar
3 oz. (1/2 cup) granulated sugar
For Orange Topping:
1 can (approximately 11 ounces/311 grams) mandarin orange segments in juice
10-12 oz. water PLUS juice from canned mandarin orange segments
3 oz. (1/2 cup) granulated sugar
3 tablespoons unflavored instant jelly OR 1 envelope (1/4 oz/7g) Knox Unflavored Gelatine
3 tablespoons cornflour (or cornstarch)
1 teaspoon orange food colouring (paste), or liquid food coloring
Instructions:
For Cake:
1. In a large mixing bowl, mix the vegetable oil with the 2 oz. water.
2. Mix in superfine flour or cake flour if using (sifted with baking powder) alternately with the all-purpose (plain) flour.
3. Add egg yolks to mixture, one at a time, followed by the food colouring. Blend well.
4. In another bowl, beat egg whites, cream of tartar and sugar until light and fluffy or until stiff peaks form (tips stand straight). Pour egg yolk batter in a thin stream over beaten egg whites mixture; gently fold together.
5. Pour batter into an ungreased 9 or 10-inch tube pan (23cm - 25cm chiffon tube pan). Batter should come up to about 1 inch from top of pan.
6. Bake in preheated 325 degree F to 350 degree F (160 C to 180 C) oven for 50-60 minutes or until top of cake springs back when touched lightly.
Remove cake from oven; invert in its pan. Cool in pan.
7. Gently loosen side of cake from pan with a spatula or knife. Invert onto a serving plate and remove pan.
For the Topping:
Combine the cornflour and jelly (unflavored knox gelatine) in a saucepan. Add water and juice from can of mandarin oranges. On medium heat, stir mixture constantly to prevent clumping. Add in the food colouring paste (or liquid) and sugar. Bring the mixture to a boil on medium heat. Stir continuously until it becomes thick. Spread the mandarin oranges and the topping onto cooled cake, or spoon over each individual slice.
Makes 12 servings.
Source: Bea
Submitted By: Bea
Date: April 29, 2003
Click here to view recipe and photo of Orange Chiffon Cake on Diana's Desserts Website
Cinco de Mayo
Cinco de Mayo falls on Thursday May 5, 2005
Cinco de Mayo is a date of great importance for the Mexican and Chicano communities. It marks the victory of the Mexican Army over the French at the Battle of Puebla. Although the Mexican army was eventually defeated, the "Batalla de Puebla" came to represent a symbol of Mexican unity and patriotism. With this victory, Mexico demonstrated to the world that Mexico and all of Latin America were willing to defend themselves of any foreign intervention, especially those from imperialist states bent on world conquest.
Cinco de Mayo's history has its roots in the French Occupation of Mexico. The French occupation took shape in the aftermath of the Mexican-American War of 1846-48. With this war, Mexico entered a period of national crisis during the 1850's. Years of not only fighting the Americans but also a Civil War, had left Mexico devastated and bankrupt. On July 17, 1861, President Benito Juarez issued a moratorium in which all foreign debt payments would be suspended for a brief period of two years, with the promise that after this period, payments would resume.
The English, Spanish and French refused to allow President Juarez to do this, and instead decided to invade Mexico and get payments by whatever means necessary. The Spanish and English eventually withdrew, but the French refused to leave. Their intention was to create an Empire in Mexico under Napoleon III. Some have argued that the true French occupation was a response to growing American power and to the Monroe Doctrine (America for the Americans). Napoleon III believed that if the United States was allowed to prosper indiscriminately, it would eventually become a power in and of itself.
In 1862, the French army began its advance. Under General Ignacio Zaragoza, 5,000 ill-equipped Mestizo and Zapotec Indians defeated the French army in what came to be known as the "Batalla de Puebla" on the 5th of May.
In the United States, the "Batalla de Puebla" came to be known as simply "Cinco de Mayo" and unfortunately, many people wrongly equate it with Mexican Independence which was on September 16,1810, nearly a fifty year difference. Over, the years Cinco de Mayo has become very commercialized and many people see this holiday as a time for fun and dance.
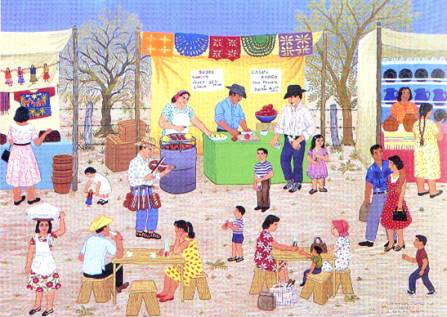
Oddly enough, Cinco de Mayo has become more of a Chicano holiday than a Mexican one. Cinco de Mayo is celebrated on a much larger scale here in the United States than it is in Mexico. People of Mexican descent in the United States elebrate this significant day by having parades, mariachi music, folklorico dancing and other types of festive activities.
Source: CLNet
Treats for Cinco de Mayo

Berry-Apple Empanadas
Servings: Makes 12 small empanadas
Comments:
Empanadas, a traditional Mexican pastry with a meat, vegetable or dessert filling. Try this easy berry-apple version, it's just the right size for passing among your fiesta guests for Cinco de Mayo.
Ingredients:
For Filling:
1 cup finely chopped, pared apple (about 1 medium size, tart variety such as Granny Smith)
1/4 cup chopped walnuts
1/4 cup granulated sugar
2 tablespoons all-purpose flour
1 teaspoon ground cinnamon
1 teaspoon vanilla extract
Dash salt
1 (16.5 oz.) can blackberries, raspberries or boysenberries, drained
Pastry and Topping:
3 single pastry crusts for 9-inch pie (ready-to-use, mix or homemade)
Cinnamon-sugar for dusting (see below)
2 tablespoons butter, melted
Instructions:
Preheat oven to 400 degrees F (200 C). Lightly grease one large cookie sheet.
For Filling:
Combine apple, walnuts, sugar, flour, cinnamon, vanilla and salt in medium bowl and mix well. Gently fold in berries. Set aside.
For Pastry and Topping and To Assemble Empanadas:
Roll out pastry and cut into twelve 4 1/2-inch rounds. Place 2 tablespoons berry filling on half of round, leaving about 1/2 inch along edges. Fold the other half of pastry over filled half, moisten edges and seal by pressing with fork. Repeat this procedure until all rounds are folded and sealed.
Combine 2 tablespoons sugar with 1/2 teaspoon ground cinnamon. Brush each empanada with melted butter and sprinkle with cinnamon-sugar. Bake in preheated 400 degree F (200 C) on prepared cookie sheet for 18-20 minutes or until golden brown.
Makes 12 small empanadas.
Click here to view recipe and photo of Berry-Apple Empanadas on Diana's Desserts Website
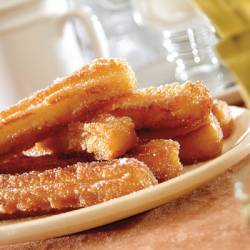
Churros
Servings: 12-14
Comments:
This Spanish and Mexican specialty consists of a sweet-dough spiral that is deep-fried and eaten like a doughnut. Churros are usually coated with a mixture of cinnamon and confectioners' (or granulated) sugar. As an extra special treat, dip your churros in Chocolate Dipping Sauce (see recipe below), or in a cup of piping hot chocolate.
Ingredients:
2 tbsp. vegetable oil
1 tbsp. confectioners' or granulated sugar, plus 2/3 cup to roll the churros in
1/2 teaspoon ground cinnamon
1 cup (4 1/2 ounces) all-purpose flour
Vegetable oil to a depth of 1 inch for frying
pinch salt
Chocolate Dipping Sauce, see recipe below (optional)
Instructions:
In a small bowl, mix the sugar and ground cinnamon together, set aside.
For the Dough:
In a medium-small (2-quart) saucepan, combine the oil, 1 tablespoon sugar and 1/2 teaspoon salt with 1 cup water. Set over high heat and bring to a boil, stirring occasionally. Remove from the heat and add the flour all at once, stirring vigorously until the mixture forms a thick, smooth-textured ball. Let cool in the pan.
To Fry the Churros:
Spread the 2/3 cup sugar over the bottom of a baking pan and mix in the optional cinnamon. When you're ready to eat the churros, heat the oil in a large pan (my preference for ease and consistency of temperature is a heavy pan or cast-iron skillet that's about 9 inches across and 3 inches deep) over medium to medium-high to about 375 degrees F (190 C) (the oil will shimmer on the surface and give off that characteristic hot oil aroma).
Scoop the dough into a churrera, a cookie press fitted with a 3/8-inch fluted opening or a heavy-duty (canvas-type) pastry bag fitted with a 3/8-inch star tip. Holding your pressing apparatus a few inches above the hot oil, press out a 5-inch length of dough (the end will dangle into the oil), then pull it free from the press with your fingertips.
Cook this one churro, turning occasionally, until it is deep golden brown, about 2 to 3 minutes if the oil temperature is right. Remove it to drain on paper towels and let it cool a minute, then break it open to check for doneness-it should be just a little soft inside, but not too doughy. Too low an oil temperature, and the churros will take a long time to color, usually bursting apart before they're brown; too high a temperature, and they'll brown quickly but not cook enough.
Adjust the temperature if necessary, then press out and fry the churros 4 or 5 at a time, draining each batch on paper towels. Put the sugar/cinnamon mixture on a large plate and roll the churros luxuriously in mixture while they are still warm. If desired, dip churros in Chocolate Dipping Sauce or in a cup of piping hot chocolate. They're ready to enjoy.
Makes 12-14 churros.
Chocolate Dipping Sauce
Ingredients:
4 ounces dark chocolate, chopped
1 cup milk, plus 1 cup
1 tablespoons cornstarch
4 tablespoons sugar
Instructions:
Place the chocolate and half of the milk in a pan and heat on low. When the chocolate has melted, dissolve the cornstarch in the remaining milk and whisk into the chocolate with the sugar. Cook on low heat, whisking constantly, until the chocolate is thickened, about 5 minutes. Add extra cornstarch if it does not start to thicken after 5 minutes. Remove and whisk smooth. Pour and serve in cups for dipping churros.
Makes 12-14 churros.
Note:
The churro dough can be prepared up to several hours before frying; cover it and leave at room temperature. If you can't fry the churros just before eating, warm them for 3 or 4 minutes in a 350�F oven, but always serve them warm.
Variation:
Add 1/4 cup (1 ounce) finely ground pecans and 1/2 teaspoon very finely chopped orange zest (colored rind only) to the dough along with the flour.
Source: Mexico One Plate At a Time. Author: Rick Bayless
Click here to view recipe and photo of Churros on Diana's Desserts Website
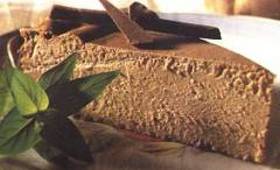
Mexican Chocolate Pie
(Pastel de Chocolate Mexicano)
Servings: 6
Comments:
Pecans, Mexican Chocolate, butter, chocolate pudding, cream cheese. Who could ask for anything more in a pie. A super Cinco de Mayo dessert, Viva Mexico!
Ingredients:
2 cups graham cracker, crushed
1 cup pecans, finely chopped
1/2 cup butter or margarine melted
2 cups milk
1 package (3 5/8 oz. size) chocolate pudding and pie filling mix
1 circular tablet Mexican Chocolate*
1 (8 oz.) package cream cheese
Decoration (optional):
Whole or coarsely chopped pecans
Chocolate shavings
Instructions:
In a bowl, combine crushed graham crackers and nuts. Set one cup of graham cracker crumb mixture aside. To the remaining mix, add melted butter and press on bottom and up sides of a 9-inch pie pan. Heat milk and Mexican chocolate over low heat. Add pudding and stir occasionally until thickened. Add softened cream cheese to pudding and stir until melted. Pour contents into pie pan and let cool. Refrigerate several hours before serving. If desired, garnish edges and top with reserved graham cracker crumb mixture.
Optional:
Decorate top of pie with whole or chopped pecans or chocolate shavings.
*Note: Mexican chocolate can be purchased at Mexican or Hispanic markets or grocery stores, or online at: http://www.mexgrocer.com
Makes 6 servings.
Click here to view recipe and photo of Mexican Chocolate Pie (Pastel de Chocolate Mexicano) on Diana's Desserts Website

Mother's Day
Sunday May 8, 2005
The Story of Mother's Day
The earliest Mother's Day celebrations can be traced back to the spring celebrations of ancient Greece in honor of Rhea, the Mother of the Gods. During the 1600's, England celebrated a day called "Mothering Sunday". Celebrated on the 4th Sunday of Lent (the 40 day period leading up to Easter), "Mothering Sunday" honored the mothers of England.
During this time many of the England's poor worked as servants for the wealthy. As most jobs were located far from their homes, the servants would live at the houses of their employers. On Mothering Sunday the servants would have the day off and were encouraged to return home and spend the day with their mothers. A special cake, called the mothering cake, was often brought along to provide a festive touch.
As Christianity spread throughout Europe the celebration changed to honor the "Mother Church" - the spiritual power that gave them life and protected them from harm. Over time the church festival blended with the Mothering Sunday celebration . People began honoring their mothers as well as the church.
In the United States Mother's Day was first suggested in 1872 by Julia Ward Howe (who wrote the words to the Battle hymn of the Republic) as a day dedicated to peace. Ms. Howe would hold organized Mother's Day meetings in Boston, Mass ever year.
In 1907 Ana Jarvis, from Philadelphia, began a campaign to establish a national Mother's Day. Ms. Jarvis persuaded her mother's church in Grafton, West Virginia to celebrate Mother's Day on the second anniversary of her mother's death, the 2nd Sunday of May. By the next year Mother's Day was also celebrated in Philadelphia.
Ms. Jarvis and her supporters began to write to ministers, businessman, and politicians in their quest to establish a national Mother's Day. It was successful as by 1911 Mother's Day was celebrated in almost every state. President Woodrow Wilson, in 1914, made the official announcement proclaiming Mother's Day as a national holiday that was to be held each year on the 2nd Sunday of May.
While many countries of the world celebrate their own Mother's Day at different times throughout the year, there are some countries such as Denmark, Finland, Italy, Turkey, Australia, and Belgium which also celebrate Mother's Day on the second Sunday of May.
Source: Holidays on the Net
http://www.holidays.net
Mother's Day Sweets
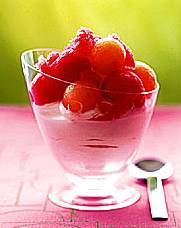
Frozen Melon Parfait
Servings: 6
Comments:
Try this sweet, cool and refreshing dessert for a special day, such as Mother's Day. Your efforts will be greatly appreciated and you'll get many compliments on this fancy but quite easy to make dessert. Mom will love it!
Ingredients:
2 eggs, separated
1 cup granulated sugar
1 cup heavy whipping cream
Zest of 1 orange
1 cantaloupe
1 small watermelon (seedless, if possible)
Instructions:
Whip the yolks with 3 tablespoons of sugar in a bowl, and set aside. Whip the egg whites until fluffy in a large bowl, and gradually add 5 tablespoons sugar, continuing to beat until stiff peaks form. Whip the cream to soft peaks. Fold all the ingredients together, along with the zest. Fill six goblets halfway with the parfait, and place in the freezer for 2 to 3 hours.
Using a small melon baller, scoop 2 cups of balls from each melon, and set aside. Cut out the remaining cantaloupe flesh, and pur�e with sugar to taste, to make about 1/2 cup. Pour the pur�e into a shallow container, and freeze. Cut the remaining watermelon into chunks, strain the juice from them, place the juice in a container, and freeze.
Scrape the frozen melon mixtures with a spoon or fork to form granules of melon ice. Arrange the melon balls over the parfait, and top with the ice granules.
Makes 6 servings.
Source: Chef, Joseph Murphy of Blue Fin Restaurant, New York City
Click here to view recipe and photo of Frozen Melon Parfait on Diana's Desserts Website
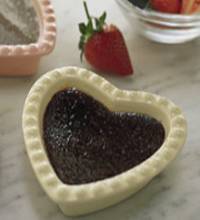
Chocolate Creme Brulee
Servings: 4
Comments:
Creme Brulee
Definition: [krehm broo-LAY] The literal translation of this rich dessert is "burnt cream." It describes a chilled, stirred custard that, just before serving, is sprinkled with brown or granulated sugar. The sugar topping is quickly caramelized under a broiler or with a salamander. The caramelized topping becomes brittle, creating a delicious flavor and textural contrast to the smooth, creamy custard beneath.
Copyright (c) 1995 by Barron's Educational Series, from The New Food Lover's Companion, Second Edition, by Sharon Tyler Herbst
A "must have" dessert for chocolate lovers! These luscious creme brulee's can be made in heart shaped ramekins for Valentines Day or for that special dessert for Mother's Day.
Ingredients:
2 cups heavy cream
3 oz. good quality bittersweet chocolate, chopped into small pieces
3 large egg yolks
6 tbsp. granulated sugar
1 tsp. vanilla extract
Instructions:
Position a rack in the center of an oven and preheat to 325 degrees F (160 C). Have a pot of boiling water ready.
In a saucepan over medium heat, warm the cream until small bubbles form around the edges of the pan, 2 to 3 minutes. Remove from the heat and stir in the chocolate until melted and blended. Cool slightly.
In a bowl, whisk together the egg yolks and 2 tbsp. of the sugar until the mixture is pale yellow and thick ribbons fall from the whisk, about 5 minutes. Slowly stir in the warm chocolate cream, then stir in the vanilla.
Line a 3-inch-deep baking pan with a kitchen towel and place four 6-oz. ramekins or dessert cups in the pan. Pour the chocolate mixture through a fine-mesh sieve set over a bowl. Divide the chocolate mixture among the ramekins. Add boiling water to fill the pan halfway up the sides of the ramekins and cover the pan loosely with aluminum foil.
Bake until the custards are just set around the edges, 25 to 30 minutes. Transfer the ramekins to a wire rack and cool to room temperature. Cover and refrigerate for at least 4 hours or up to 2 days.
Just before serving, sprinkle 1 tbsp. sugar evenly over the surface of each custard. Using a kitchen torch, move the flame continuously in small circles over the surface until the sugar bubbles and just begins to turn golden, 20 to 30 seconds per custard. Serve immediately.
Makes 4 servings.
Click here to view recipe and photo of Chocolate Creme Brulee on Diana's Desserts Website
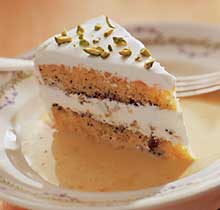
Pistachio Cream Cake
Servings: 12-16
Comments:
Make this lovely cake for a special day such as Mother's Day. The cake is creamy rich, and makes a beautiful presentation. The sesame custard sauce adds a wonderful special flavor.
Ingredients:
About 2 tablespoons butter or margarine
About 1 1/2 cups sifted cake flour
1 1/4 cups granulated sugar
1 teaspoon baking powder
3/4 cup coarsely chopped roasted pistachios (salted or unsalted)
2 tablespoons poppy seeds
1 teaspoon grated lemon peel
1 teaspoon grated orange peel
1/2 teaspoon ground cardamom
1/2 cup milk
1 teaspoon vanilla extract
3 large eggs
Cream Frosting (recipe follows)
Sesame Custard Sauce (recipe follows)
Instructions:
1. Butter and flour two 9-inch round cake pans. Line bottoms with waxed paper cut to fit; butter paper and dust with flour.
2. In a small bowl, mix 1 1/2 cups cake flour, 1/4 cup sugar, baking powder, 1/2 cup chopped pistachios (wrap remaining airtight), poppy seeds, lemon peel, orange peel, and cardamom.
3. In a glass measure or small microwave-safe bowl, melt 2 tablespoons butter in a microwave oven on full power (100%), 1/2 to 1 minute. Add milk and vanilla.
4. In a deep bowl, with a mixer on high speed, beat eggs with remaining 1 cup sugar until thick enough to hold mounds briefly when you lift the beater, 4 to 5 minutes. Add flour mixture and milk mixture. Stir or mix gently until well blended. Scrape batter equally into prepared pans.
5. Bake cake layers on center rack in a 325 degrees F (160 C) regular or convection oven until edges are browned and begin to pull from pan sides and centers spring back when lightly pressed, 20 to 25 minutes.
6. Cool layers in pans on a rack for about 10 minutes. Invert cakes from pans onto rack and carefully pull off and discard waxed paper.
7. When layers are cool to touch, place one, bottom side up, on a flat plate (10 to 12 in. wide). Mound about 2 cups of the Cream Frosting on cake; with a long, flexible metal spatula, spread frosting level out to cake rim. Place remaining cake layer, bottom side down, on frosting. Scrape remaining frosting on top of cake and, with the spatula, push enough over the sides to frost thickly, then swirl evenly over top of cake. Cover (a large bowl inverted over the cake works best) and chill at least 2 hours or up to 1 day.
8. Uncover cake and sprinkle with remaining 1/4 cup pistachios. On each dessert plate, spoon 3 to 4 tablespoons Sesame Custard Sauce. Cut cake into wedges and set in sauce on plates.
Makes 12-16 servings.
Cream Frosting:
In a chilled large bowl, with a mixer on high speed, beat 1 1/2 cups whipping cream until it holds soft, distinct peaks. Add 1/2 cup sour cream, 1/4 cup sugar, and 1/2 teaspoon each almond extract and vanilla. Beat on high speed until mixture is thick enough to hold soft, distinct peaks. Use to fill and frost Pistachio Cream Cake (preceding).
Sesame Custard Sauce
PREP AND COOK TIME: About 25 minutes, plus at least 15 minutes to chill.
NOTE:
If making up to 2 days ahead, cover and chill.
Makes about 3 cups
5 large egg yolks
1 tablespoon Asian (toasted) sesame oil
3 tablespoons sesame seeds
3/4 cup sugar
1 cup whipping cream
1 3/4 cups milk
1. In a large metal bowl, combine egg yolks and sesame oil; whisk just enough to blend.
2. In a 10- to 12-inch frying pan over medium heat, stir and shake sesame seeds until pale golden brown, about 3 minutes. Pour into a blender with the sugar and whirl until seeds are coarsely ground. Return mixture to frying pan; add whipping cream and milk. Stir over medium-high heat until scalding (bubbles form at pan rim but mixture does not boil), about 5 minutes.
3. Whisk cream mixture into egg yolk mixture, then scrape back into frying pan. Stir over medium-low heat with a flexible (silicone or heat-resistant plastic) spatula, scraping pan bottom and sides, until custard is thick enough to coat a metal spoon with a velvety layer, about 15 minutes. Immediately pour mixture back into metal bowl and nest in ice or ice water; stir often until cool, about 15 minutes. Pour custard through a fine strainer into another bowl, pressing moisture from seeds; discard seeds. Serve custard or cover and chill.
Source: Sunset Magazine
Click here to view recipe and photo of Pistachio Cream Cake on Diana's Desserts Website

Memorial Day
Memorial Day is much more than a three-day weekend that marks the beginning of summer. To many people, especially the nation's thousands of combat veterans, this day, which has a history stretching back all the way to the Civil War, is an important reminder of those who died in the service of their country.
So go ahead and have a nice long weekend (we all deserve that) and celebrate the beginning of Summer with barbeques and picnics, but please remember what this day is really about, to honor the veterans who
fought to keep our country safe.

Desserts for the Long Weekend
Blackberry Cobbler
Servings: 8-10
Comments:
Instead of using only blackberries, try mixing in some raspberries and blueberries as well. Or replace the blackberries with sliced peaches or nectarines and a handful of dried sour cherries or cranberries. A combination of 3 or 4 plum varieties, all pitted and quartered, is also wonderful. If you'd like, add a pinch of freshly grated nutmeg or a dash of vanilla or almond extract to the fruit. Or sprinkle a small handful of sliced almonds or chopped pecans over the topping before baking.
This is a great dessert to serve at a picnic or barbeque as it can be served warm or at room temperature.
Ingredients:
For The Filling:
6 cups blackberries or a mix of seasonal berries
1/3 cup granulated sugar
1 tbsp.all-purpose flour
1 tsp. finely grated lemon zest
Pinch of salt
For The Topping:
1 1/4 cups all-purpose flour
1/3 cup granulated sugar
2 tsp.baking powder
1/2 tsp.ground cinnamon
1/4 tsp.salt
1 large egg
1/2 cup buttermilk
6 tbsp. (3/4 stick/3 oz/85g) unsalted butter, melted and cooled
1/2 tsp. vanilla extract
Instructions:
Preheat an oven to 375 degrees F (190 C). Lightly grease a 2-quart baking dish.
To make the filling, in a bowl, gently toss the berries with the sugar, flour, zest and salt until blended. Pour into the prepared baking dish.
To make the topping, in a bowl, stir together the flour, sugar, baking powder, cinnamon and salt. In another bowl, whisk together the egg, buttermilk, butter and vanilla until well blended. Pour the wet ingredients into the dry ingredients and, using a rubber spatula, fold gently until the flour is moistened and the mixture forms a soft dough.
Drop heaping spoonfuls of the dough onto the fruit, spacing them evenly; the dough will not completely cover the fruit. Bake until the filling is bubbling, the topping is browned and a toothpick inserted into the topping comes out clean, about 45 minutes. Serve warm or at room temperature.
Makes 8-10 servings.
Click here to view recipe and photo of Blackberry Cobbler on Diana's Desserts Website
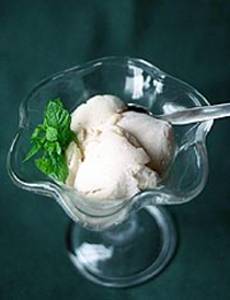
Cool Creamy Dessert
Servings: Makes 2-4 servings
Comments:
Kids love this ice cream scooped into cones and sprinkled with chocolate jimmies and chopped nuts. Refreshing for kids and adults alike and you don't even need an ice cream maker!
Ingredients:
3 ripe bananas
1/2 cup sweetened condensed milk
1/2 cup heavy cream
1 tsp. vanilla extract
Instructions:
1. Peel and slice the bananas, then place them in the blender.
2. Add the remaining ingredients and blend together on high speed until thick and creamy.
3. Scrape mixture into a container and freeze.
4. Before serving, move the ice cream from the freezer to refrigerator for 20 minutes to soften it slightly.
Enjoy!
Makes 2-4 servings.
Source: Better Homes and Gardens Australia
Click here to view recipe and photo of Cool Creamy Dessert on Diana's Desserts Website
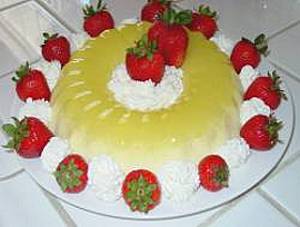
Creamy Lemon-Pineapple Dessert Mold
Servings: Makes 1 large mold, or 6-8 individual molds
Comments:
If you like lemon, pineapple, vanilla ice cream, and whipped cream, you will love this very creamy, tasty and refreshing gelatine dessert. Serve with fresh strawberries for an attractive presentation.
Ingredients:
2 cups boiling water
1 package (6 oz. size) OR, 2 packages (3 oz. size) lemon flavored gelatin
1 (8 oz.) can crushed pineapple, drained
1 pint (0.5 liter) vanilla ice cream, softened
1 (8 oz.) container frozen non-dairy whipped topping, thawed
Garnish: (optional)
Fresh strawberries, washed, drained and dried
Whipped cream, or non-dairy whipped topping, thawed
Mint sprigs
Instructions:
1). Stir the 2 cups boiling water into gelatine in large bowl at least 2 minutes until completely dissolved. Stir in drained crushed pineapple.
2). Fold in softened ice cream until smooth and well combined. Gently stir in the 8 oz. thawed frozen whipped topping with wire whisk until smooth.
3). Pour into a 6 to 8 cup gelatin or dessert mold, or for individual servings, pour into six to eight 1 cup molds.
4). Refrigerate for 4 hours or until firm; then unmold to serve.
5). For garnish, pipe rosettes with whipped topping or whipped cream around the edges of gelatine dessert and place strawberries on each side of rosettes, and if you are using a tube mold, pipe whipped cream or whipped topping inside the hole in the center of gelatin dessert. You may also garnish with mint sprigs if desired. Serve chilled. Store in refrigerator.
Makes 1 large gelatine mold, or 6-8 individual gelatine molds.
Photograph taken by Diana Baker Woodall� 2002
Source: DianasDesserts.com
Click here to view recipe and photo of Creamy Lemon-Pineapple Dessert Mold on Diana's Desserts Website
Food Tips and Information Section
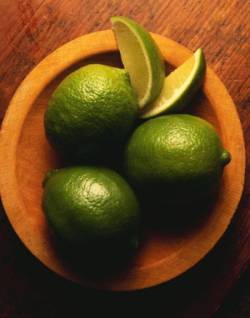
Limes
While rarely consumed on their own, limes make a major contribution to the flavors of many of the foods we eat. These flavor-packed fruits are also loaded with vitamin C, which among its other health-promoting virtues also prevents a disease called scurvy. In the 18th century, the British navy ordered ships going on long journeys to carry limes for their crew (hence the nickname "limeys" for British sailors), although, at the time, it was not understood exactly how the fruit prevented scurvy. It wasn't until vitamin C was discovered in 1932 that scientists understood that it was the vitamin, not the fresh fruit itself, that protected against the disease.
Aside from supplying substantial amounts of vitamin C, the main benefits of limes relate to their seasoning potential. Slightly sweet, tangy lime juice and lime zest can help you cut down on the amount of salt you add to dishes you prepare. They also enhance the flavor of foods such as rice, potatoes, salads, and cooked vegetables while adding no fat and only negligible calories.
Limes probably originated on the Indian subcontinent. It seems likely that limes (and lemons) were popularized in Europe at the time of the Crusades, and Columbus may have brought the seeds of both fruits to the New World on one of his voyages. Citrus fruits, including lemons and limes, were established in what is now Florida in the 16th century.
Limes are tropical plants, and, not surprisingly, their growing region in the United States is restricted; only southern Florida and the Southwest have climates hospitable to these fruits. The commercial lime industry in Florida began around 1880, then declined after a damaging freeze in the 1890s. Lime growing revived there after World War I and increased in the decades that followed. Today, south Florida is the source of more than 85% of North American limes. Southern California also produces a small lime crop.
Frozen and bottled lime juice, though not as flavorful (or nutritious) as the fresh-squeezed equivalent, can be a useful pantry staple; however, the fresh fruit keeps well, so you should always have some on hand.
Varieties
Tahitian Limes:
Most limes are a Tahitian strain (they are believed to have originated on that island) that comes in two similar varieties: Persian limes, which are egg-sized, oval fruits cultivated in Florida; and a Bearss (two s's is correct) variety, which is a smaller, seedless California-grown lime. Both are greenish yellow when fully mature, but are sold at the green stage for better flavor.
Key Limes:
Key limes are smaller and rounder, with a higher acid content than Tahitian limes. Grown only in southern Florida, they are best known as an ingredient in Key Lime Pie. A small number of Key limes are sold commercially, and their bottled juice may be found in some gourmet shops.
Availability
Limes are also available throughout the year, with supplies most plentiful from May through October.
Shopping
Limes should be firm, glossy, and bright--beautiful enough to be treated as ornaments in your kitchen. They should be dark green: Limes turn from green to yellow as they ripen, but it's the immature fruits that have the desirably tart juice; yellowish limes have an insipid flavor.
A very coarse exterior may indicate an excessively thick skin, which in turn may mean less flesh and juice; heavy fruits with fine-grained skin are juiciest. Avoid both hard, shriveled limes as well as spongy, soft ones.
Storage
While lemons will keep for about two weeks without refrigeration, limes are more perishable and should be refrigerated immediately. Limes stored in a plastic bag in the refrigerator crisper will keep for up to six weeks.
If you have extra limes on hand and want to save them before they spoil, squeeze the juice into an ice-cube tray, then transfer the frozen juice cubes to a plastic bag.
Preparation
To get the most juice from a lime, the fruit should be at room temperature or warmer; if need be, place it in hot water to warm it, or microwave it for 15 to 30 seconds. Then roll the fruit under your palm on the countertop until it feels softened.
There are lots of gadgets for juicing citrus fruits--juicers onto which you press the fruit, reamers you twist into the fruit--but it's simplest to halve the fruit and squeeze it in your hand. If you don't need all the juice at once, you can pierce the fruit with a toothpick and squeeze the juice from the opening; "reseal" the fruit by reinserting the toothpick.
Recipes often call for lime zest--the flavorful colored part of the peel. Wash and dry the fruit, then use the fine side of a hand grater, a special zesting tool, a sharp paring knife, or a vegetable peeler to remove the zest. When grating or paring the zest from a lime, do not include any of the bitter white pith along with it.
A large lime will provide 2 to 3 tablespoons of juice and 1 to 2 teaspoons of zest.
Nutritional Information
Limes/1 medium
Calories: 24
Total fat (g): 0.2
Saturated fat (g): 0
Monounsaturated fat (g): 0
Polyunsaturated fat (g): 0
Dietary fiber (g): 2.2
Protein (g): 1
Carbohydrate (g): 8
Cholesterol (mg): 0
Sodium (mg): 2
Vitamin C (mg): 23
Source: Wholehealthmd.com:
http://www.wholehealthmd.com/refshelf/foods_view/1,1523,210,00.html
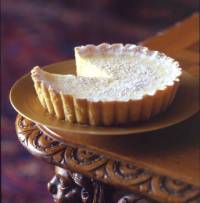
Lime Custard Tart
Servings: 8
Ingredients:
For Crust:
1 cup plus 2 tablespoons all-purpose flour
1/4 cup granulated sugar
1/2 teaspoon salt
6 tablespoons (3/4 stick/3 oz/85g) unsalted butter, softened
1 large egg, lightly beaten
For Custard:
6 large eggs
1 cup heavy cream
1 cup granulated sugar
2/3 cup fresh lime juice
Garnish:
Confectioners' sugar
Special equipment:
An 8 or 9-inch fluted tart pan (2 inches deep) with a removable bottom.
Pie weights, raw rice, or raw beans
Instructions:
Make Crust:
Pulse together all crust ingredients in a food processor or beat with an electric mixer until a dough forms. Press dough evenly onto bottom and up side of tart pan with floured fingers. Chill shell until firm, about 30 minutes.
Preheat oven to 350 degrees F (180 degrees C).
Line shell with foil and fill with 1 inch of pie weights, raw rice, or raw beans; then bake in middle of oven until edge is pale golden, about 22 minutes. Carefully remove foil and bake shell until edge is golden and bottom is pale golden, about 20 minutes more. Cool completely in pan on a rack.
Make Custard:
Reduce oven temperature to 300 degrees F (150 degrees C).
Mix together all custard ingredients in a bowl with a whisk (do not beat) until just combined. Set tart shell (in tart pan) in a shallow baking pan and pour three fourths of custard into shell. Carefully put tart in middle of oven and pour remaining custard into shell with a small cup.
Bake tart until just set in center, about 1 hour. Cool tart completely in tart pan on rack, then chill, covered, until cold, at least 2 hours. Just before serving, remove side of pan, and dust top of tart with confectioners' sugar.
Tart shell can be baked 3 days ahead and kept, wrapped in plastic wrap, at cool room temperature. Tart can be chilled up to 2 days.
Makes 8 servings.
Source: Gourmet Magazine, December 2002
Click here to view recipe and photo of Lime Custard Tart on Diana's Desserts Website

Tips Section
(The Picture Says it All, Doesn't It?)
This Month's Tips:
Whether you're baking for your kids, or your kids are looking to make their own cakes and cookies, there are a few simple tips that will make you a better baker:
1. Sprinkling confectioner's sugar (icing sugar) on the serving plate will keep the cake from sticking to it.
2. Adding raisins or other dried fruits to cake or cookie batter? Plump them first by soaking them in water.
3. When you bake a chocolate cake, add a teaspoon of vinegar to the baking soda. The cake will come out moist, with no vinegar taste.
4. If your cake sticks to the pan, place the pan on a damp towel - the moisture will help release the cake.
5. Cut a cake into layers using dental floss. Wrap the floss around the circumference of the cake and cross the ends. Pull gently but firmly. The floss will cut right through.
Most Important Tip:
Oh, and don't forget to set a timer when baking (or else you'll have that same expression on your face as the person in the photo above). We all know what that feels like, don't we?
Until Next Month
I hope you've enjoyed the information and history about Cinco de Mayo and Mother's Day. Please let me know if you made any of the recipes for these holidays from this edition of Diana's Desserts Newsletter.
Also, I hope you learned a little bit more about Limes, and that the cake making and servings tips helped you out.
In the next edition of Diana's Desserts Newsletter, I will be sharing with you some nice dessert recipes for the Jewish holiday of Shavuot which begins at sundown, Sunday June 12th, and recipes for Father's Day and Juneteenth Day which both fall on Sunday June 19th this year.
Please let me know if you like the new Ratings and Reviews section for the recipes on my website. It should be a helpful tool for those of you who want to learn more about a recipe before you try it.
If you'd like to submit one of your favorite dessert, bread or beverage recipes to Diana's Desserts Website, click on the link below to bring you to the Submit a Recipe Page:
Submit a Recipe
Have a great month, and I wish all the Mother's a Happy Mother's Day, and for those of you who celebrate Cinco de Mayo, have a festive time!
Sincerely, Diana
|
|