 Servings: Makes approximately 3 1/2 dozen cookies
Ingredients:
1 cup (2 sticks/8 oz./225g) butter
1 cup brown sugar
2 cups molasses
1 egg
5 cups all-purpose flour
2 tbsp. pumpkin pie spice
1 tsp. baking soda
Icing (see recipe below) optional
Instructions:
Cream butter and sugar, add molasses and egg. Beat until smooth. Sift together flour, pumpkin pie spice and baking soda; add to mixture. Beat until well mixed. Cover and chill 2 hours.
Preheat oven to 350 degrees F/180 degrees C.
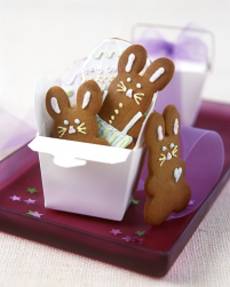
Divide dough in half. Roll dough, half at a time, to a 1/4-inch thickness. Cut out dough with 5-inch bunny or rabbit cookie cutter.
Bake cookies on greased baking sheets 9 to 11 minutes or until edges darken slightly. Cool for 5 minutes then remove to wire racks to cool completely. Repeat with remaining dough. Decorate with icing as desired.
Note: You may leave cookies plain or ice with just plain white icing or use the different food colorings for a colorful cookie.
Makes 3 1/2 dozen cookies.
Icing (optional)
Ingredients:
3 cups confectioners' sugar
1/2 teaspoon lemon juice
2 tablespoons powered egg whites
6 tablespoons warm water
Pink food coloring
Green food coloring
Blue food coloring
Yellow food coloring
You will also need:
Large resealable plastic bags
Pastry bag fitted with fine tip
Instructions:
1. Using an electric mixer set on low speed, mix powdered egg whites and warm water until all the water is incorporated, about 2 minutes.
2. Add the sugar and the lemon juice; mix on high speed until icing is smooth, about 5 minutes (at this point you can just leave the icing white or you may tint some of the icing). Divide icing evenly among 5 bowls. Set aside 1 bowl of icing.
3. Tint remaining bowls of icing pink, green, blue, and yellow; spoon each color into large resealable plastic bags; snip off one corner for piping.
4. Using tinted icing, pipe an outline onto each cookie then fill with base color; spread icing evenly. Let icing set until dry.
5. Place reserved white icing in a pastry bag fitted with a fine tip. Pipe designs on cookies as desired. Let icing set until dry.
Source: DianasDesserts.com
Date: March 3, 2007