Tips for Pies and Tarts
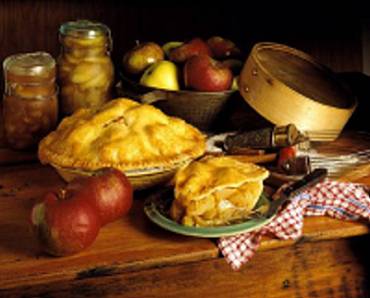
Pies and Tarts
Using The Right Pie Pan
For optimum baking results, use a glass or dull-metal pie pan. Avoid shiny metal or disposable aluminum pans, which reflect heat and prevent crusts from browning. Dark pans may cause crusts to brown too much.
Avoid pans with holes in the bottom.
To Prevent Over-Browning Of Pie Crust
To keep baked edges from getting too brown, cover the edges with foil after the first 15 minutes of baking.
Use a 12-inch square piece of foil. Cut out a 7-inch circle from the center, and gently fold the foil "ring" around the crust's edge. Be careful, the pie will be hot!
Tenderizing for Pastry and Pie Doughs
Add one teaspoon of vinegar or lemon juice as part of your liquid for each cup of flour in pastry and pie dough recipes. This won't affect the flavor but will result in more tender baked products.
Rolling Out Pie Dough
Flour work surface very lightly. Excess flour will toughen pastry dough. Add additional flour sparingly, as needed. Roll out dough from the center to avoid overworking. A straight rolling pin is preferable for beginners. Dough can be easily moved on a rolling pin to flour the work surface or to fit dough into a pie plate. To size the dough, place a pie plate upside down on the rolled-out dough and measure an additional 1 inch around the perimeter of the plate.
"Baking Blind"
BAKING TART SHELL OR PIE CRUST "BLIND"
This is the method of pre-baking your pie or tart crust before adding the filling.
Pre-heat oven to 350F/180C.
Roll out the pastry and line the tart or pie pan carefully, making sure there are no holes. If there are, patch them with some of the leftover pastry dough. Line the pastry with parchment or waxed paper and fill with baking beans or pie weights, if you have them. If not, you can use any dried beans or rice. Bake the pastry "Blind" (without filling) at 350 degreesF/180 degreesC for 15 to 20 minutes, or until the crust is a light golden brown. Remove the paper and beans, and allow crust to cool. After crust has cooled completely, pour your filling into pre-baked tart shell, and bake as your recipe instructs.
Fruit Pie Filling Tips
Great Thickener For Fruit Pies
For a wonderful way to thicken fruit pie juices without cloudiness or taste, use potato starch in the recipe instead of cornstarch or arrowroot.
Weeping Meringues
Bakers sometimes notice that their meringue "weeps" or "sweats" after baking. The key is to spread the meringue over the filling while it's still very warm.
Lemon or cream pies with a soft meringue topping have been known to weep so excessively that the meringue skids slickly off the filling as the pie is served! And if you've had that happen, you'll know how annoying it is. The culprit is a thin layer of water sitting just at the point where the filling and the meringue meet.
Weeping meringue is usually a two-part problem, resting with both the egg white foam and the pie filling. Usually the egg whites haven't been beaten sufficiently after the sugar is added.
It is wise to begin with room-temperature egg whites and very fine granulated sugar. Once dissolved, sugar holds moisture within the whites, so it's less able to leak away. While there are other methods of making meringues, those in which the sugar is beaten into the egg whites are more stable than meringues in which sugar is folded into beaten egg whites.
Add the sugar gradually, on tablespoon at a time, beating well, so it dissolves in the egg whites. Beat until foamy and the peaks bend over in soft curls when the beater is lifted. Those fluffy peaks are stretched protein films surrounding bubbles of air that swell as the air expands during baking.
The temperature of the filing also influences the tendency of meringue to weep. If the filling is allowed to cool, the underside of the meringue never becomes hot enough to firm properly, so liquid leaks from the undercooked meringue.
To counteract this, heat the filled pie shell in a 350 degree oven for five minutes or just until steam beings to rise from the filing. Remove from the oven and quickly spoon meringue onto filling. Now, when it's returned to the oven, the heat from the filling will cook the bottom of the meringue, while it's surface browns.
Sometimes amber colored droplets appear on the surface of a meringue. If this "beading" happens immediately, usually it's because the foam has been over jelled during baking. Baking a meringue in a hot oven for a short time can minimize this problem.
Baking a meringue on a humid day can also contribute to beading because the sugar in the meringue attracts moisture from the air. After the meringue cools, beads of syrup form at the surface.
A meringue topping baked quickly (4 to 5 minutes) at 425 degrees is tendered and less sticky than one baked at 375 degrees. But beware of overcooking. Meringue that is baked too long also weeps because its moisture has been squeezed out by egg white proteins that have over thickened.
A good meringue is soft, fluffy, slightly moist, and very tender. It should have a glossy sheen and a fine grain. Meringue making is a technique worth practicing, for a perfect meringue offers a spectacular finish to a homemade pie!
Runny Pie Filling
Pie filling is "runny" most likely because it is not being baked long enough. Simply try baking 5 to 10 minutes longer than normal.
For High-Acid Pie Fillings:
Use tapioca rather than cornstarch to thicken high-acid fillings like cherries, which can cause cornstarch to fail.
Tips on Making Fruit Pies and Pie Crust
Make the dough the day before and let it rest for 1 hour refrigerated after rolling and shaping to prevent distortion and for the best shape.
If making the pie to eat the day after baking, decrease the cornstarch by 1 teaspoon.
Use dark heavy metal, ceramic, or Pyrex pie plates for the crispest crust.
For the flakiest crust with the most attractive border, preheat the oven for at least 20 minutes before baking. For a crisp bottom crust, try baking directly on the floor of the oven for the first 30 minutes of baking, or on an oven stone set on the bottom rack.
The pie's juices must be bubbling thickly all over to ensure that all of the cornstarch can absorb liquid and thicken the filling.
Single-crust pies need to have the edges protected from over browning after the first 15 minutes of baking; double-crust pies, after 30 minutes.
If the top of the pie is browning too much, tent it with foil, but be sure to make a steam hole in the center for moisture to escape so the crust stays crisp.
Allow the pie to cool on a rack to room temperature, or until barely warm, before slicing to ensure that the filling is set and will not run. This will take between 2 to 4 hours, depending on the thickness of the pie.
If you spray the pie pan lightly with nonstick vegetable shortening before lining it with the pastry, or if you grease and flour it, it is usually possible to slide out and unmold the whole pie after it has cooled completely. This makes cutting it easier and is better for both the knife and the pie plate! Greasing and flouring also gives a pleasant, slightly rough texture to the bottom crust.
Do not glaze the top of a pie. Although it will make the pie look shiny and very appealing, it seals in moisture and keeps the dough from breathing. It makes a tough crust. A light dusting of sugar is the one exception.
Seal the bottom crust of the pie. Rose obliterates "soggy bottom" by brushing the bottom crust with egg white, sieved preserves for extra flavor, or melted chocolate for the most effective moisture-proofing of all.
For certain juicy pies (peach, nectarine-raspberry), bake the pie directly on the floor of the oven for a truly crispy bottom crust.
The food processor method for making pie crusts is the easiest. It is faster than mixing by hand, and because the dough is handled less, it keeps the ingredients more chilled.
In fruit pies, berries become bitter when cooked. The solution is to bind uncooked berries with a glaze or cook only 1/4 of the berries and the remainder uncooked.
Slice apples thinly for apple pie. Thick slices promote air space and create a gap between the fruit and the crust.
For the purest flavor in fruit pies, macerate (marinate) the fruit, capture the juices, and boil and reduce the liquid. The will decrease the amount of thickener and create more intense, focused flavor and a juicy filling.
One tablespoon of cider vinegar relaxes pie dough and makes it easier to roll. It will not diminish the crust's flakiness but will diminish shrinkage as it bakes.
Butter dulls the flavor of fruit (with the exception of apples). Leave all the butter in the crust when baking fruit pies.
CLEARJEL® Thickener
This modified cornstarch is the secret ingredient that many commercial bakers use in their fruit pie fillings. Unlike ordinary cornstarch, ClearJel® works well with acidic ingredients, tolerates high temperatures, and doesn't cause pie fillings to "weep" during storage. ClearJel® is an especially good choice if you're canning homemade pie fillings, since it doesn't begin thickening until the liquid begins to cool. This allows the heat the be more evenly distributed within the jar during processing.
ClearJel comes in a powdered form, just like cornstarch, and you basically mix liquid and sugar with it, heat over medium heat and stir with a heavy spoon until thick, add a little lemon juice and boil 1 minute. Then stir in fruit and cool and use, or you can cool it and then stir in fruit. It freezes well, and it's perfect for processing canned pie fillings. ClearJel® is available from the supermarket or online at: KitchenKrafts.com
Instant ClearJel Powder = ClearJel starch: This modified cornstarch is my favorite thickener for all fruit pies. (You can use it 1 for 1 with cornstarch). It is the secret ingredient that many commercial bakers use in their fruit pie fillings. ClearJel can be purchased from the supermarket or online at: KitchenKrafts.com
ClearJel makes a fruit filling that's clear, not cloudy; has absolutely no floury or starchy taste; and is freezer-stable; you can freeze an unbaked pie and then bake it later without a chance of the filling becoming runny. ClearJel easy to use: you don't have to first precook the fruit with it as you do with cornstarch, for example. All you have to do is whisk together the ClearJel and the sugar in a small bowl, and then sprinkle this mixture over the fruit. Stir or toss well and you're done. Unlike ordinary cornstarch, ClearJel works well with acidic ingredients, tolerates high temperatures, and doesn't cause pie fillings to "weep" during storage. It is an especially good choice if you're canning homemade pie fillings, since it doesn't begin thickening until the liquid begins to cool. This allows the heat the be more evenly distributed within the jar during processing.
What To Do About Juicy Fruit For Pies
Peaches are juicy, so a trick I use that works well is letting the fruit (not blueberries) sit with a couple of extra tablespoons of sugar before making the filling. It not only helps to intensify the flavor, but also can rid the pie of nearly a half-cup of excess juice, resulting in a firm, yet supple, pie. By draining off some of the juice rather than increasing the thickener, I could fill my pie with fruit and not have to worry about oozing liquid.
Cornstarch as a Thickener
Cornstarch is also a good thickener to use with fruit to make a filling with because it does not impart it's own flavor and yields the smoothest texture. It also does not thin when reheating a slice of pie.
Cornstarch has twice the thickening power of flour, but like flour, it imparts a slightly starchy taste, especially true in juicy summer fruit pies; that's why I recommend cooking part of the fruit and cornstarch before baking a pie. But cornstarch doesn’t work when your filling is high in acidity (cherries) or if you plan to freeze the filling at any time because it loses its thickening powers over time if stored.
Soggy Bottom Crust
One of the big problems when making a fruit pie is getting a soggy bottom crust. It is usually caused by liquid fillings which are too hot coming in contact with the lower crust. Some of the liquid gets absorbed by the crust. This is a problem with custard, pumpkin and fruit pies.
To Prevent Soggy Pie Crust Bottoms
1) Moisture proof the bottom of the crust before chilling and filling. Brush melted butter on the bottom of the crust and refrigerate for about 15 minutes so it sets.
2) Use a hot oven temperature the first 15 minutes of baking.
3) Thicken the filling before adding it to the crust to be baked.
4) Place the pan on the lower oven rack on a preheated baking sheet or pizza stone.
5) Use a pan that readily absorbs heat, such as glass.
Quick-Cooking Tapioca (pearl)
Often used as a pie filling thickener because it can hold more fruit juices than other thickeners without becoming rigid. But, it is not recommended for a lattice top pie or other open fruit pie, as it remains hard when exposed the hot air of the oven. However, it can be used with a two-crust pie.
Tapioca has no flavor of its own and it cooks quickly. If you use tapioca, let the filling mixture stand for at least 15 minutes before you spoon it into the crust to bake. This will allow for more efficient thickening. When you prepare a pie filling, mix the thickener first with sugar and any spices to prevent lumps and uneven thickening, then add the fruit. Granules are gritty if under cooked but are clear and soft when fully cooked. You can make up a thickening mixture by combining 1/2 cup flour with 1/4 cup cornstarch and 1/4 cup tapioca starch. This makes enough for four 9-inch fruit pies.
Instant Tapioca-Tapioca Starch
Instant Tapioca or Tapioca starch is a fine powder made from tapioca. It creates a perfectly smooth filling and imparts a high gloss for a tasty-looking result. It’s the perfect product to use with high-acid fruits or a lattice-type pie. If you find only pearl tapioca, just place it in a spice grinder, blender, or food processor and grind away. Now you have "instant" tapioca.
Arrowroot
Because arrowroot begins to thicken long before the boiling point of fruit fillings in pies, arrowroot is not a desirable choice. It imparts no flavor of its own but provides a high gloss, and just 1 tablespoon will firm up each cup of liquid. It’s fine for high- and low-acid fruit mixtures, but it creates a gloppy mess if mixed with any dairy product. However, it breaks down under high heat.
Potato Starch
After making many pies, I found that potato starch works surprisingly well, for it was especially soft and clear, yet firm. This gluten-free starch is also used to thicken soups and gravies. Its main advantage over other starch thickeners is that it's a permitted ingredient for Passover, unlike cornstarch and other grain-based foods. Liquids thickened with potato starch should never be boiled. Supermarkets often stock it among the Kosher products.
How much fruit should I buy for my pie?
While apple pies may be filled to the very top of the pie pan, and fresh apple or frozen apples are filled above the level of the pan, cherry pies, blueberry pies, and similar fruit pies are filled to less than the rim of the pie pan. The fruit will expand during baking and the filling will tend to run out of the edges of the pie or break through the top crust of the pie and run out of the cracks in the pie crust.
HERE ARE SOME GUIDELINES FOR HOW MUCH FRUIT YOU WILL NEED FOR MAKING A 9-INCH FRUIT FILLED PIE
Rhubarb: 6 medium stalks = 5-6 cups
Apple: 8 small, 6 medium, 5 large = 6 to 8 cups
Cherry: 1 pound = 6 cups
Apricot: 10-12 medium = 5-6 cups
Raspberry: 6 (1/2 pint) baskets = 6 cups
Blueberry: 3 pint baskets = 6 cups
Peach: 10 -12 small or 6-7 large = 5-6 cups
Blackberry: 6 (1/2 pint) baskets = 6 cups
Strawberry: 4 pint baskets = 6 cups
"Sugar Pie" Pumpkin: 1/2 pound =1 cup
Sweet Potato: 1/2 pound =1 cup
Knowing Your Fruit
Apples
Apples are popular to use in pies, because of the natural pectin content will not run during baking; some work better than others. That is, the filling and the apples are bound or thickened by the natural pectin in the fruit as well as by the starch in the filling base. I like to use 2 - 3 different apple varieties in pie baking. Pick a contrast in flavor (one sweet, one tart) and texture (one that bakes firmer and one that softens during baking) for really nice results. When using canned fruit, drain the fruit and save the liquid to use in the recipe instead of water.
Blackberries
Unlike blueberries, whose acidic skin reeked havoc with the starch, blackberries can be added with the starch and sugar from the start.
Blueberries
Blueberry skins contain oxalic acid, which attacks nearly all starch thickeners if it were UNCOOKED. Peeling blueberries is an unheard-of task and would wreck their taste and shape.
Adding the berries to cooked starch seemed the only way to guarantee a consistently thickened pie *(Note: See Blueberry Lattice Pie Recipe in "My Recipe Book" under the "Pies and Tarts" category on this website). Without the sugar, the starch paste was almost thick enough to bounce. Even with the sugar, the paste was too thick. But I realized that as soon as the starch thickened, the blueberry's acidity couldn't affect it.
Cherries
Cherries need to be pitted if using fresh. Canned cherry filling is good, too. Drain the cherries and save the juice for the filling recipe when it calls for water.
Peaches
Peaches must be peeled first before using as the filling as in the Classic Peach Pie Recipe. This is best done by blanching them: slicing a cross in the bottom and then plunge them into boiling water, two at a time. You will see the cut begin to peel, immediately remove them and then plunge into ice water to chill quickly. Then after a few minutes you can pick them up and with a paring knife, peel them. They are blanched, so you don't need to worry about them browning at this point.
Miscellaneous Fruit Pie Info
During baking, my fruit pie filling boils too much before the rest of the pie is done, what should I have done?
The boiling out of fruit pies is generally caused by one or both of two causes: The baking temperature is too low; it takes too long for the crust to bake to the proper color relative to the heating up of the filling. The pie filling should not start boiling before the top crust has developed the desired color and the pies can be removed from the oven.
The sugar content in the pie filling is too low; the amount of sugar in the filling affects the boiling point of the filling. A pie filling with a low sugar content will boil sooner than a filling with a higher sugar content. Also, a stiff filling will tend to boil less than a soft filling.
Making the Perfect Pie Crust
All of the "various and sundry" suggestions you have ever heard about making pie crust are true, because pie dough is a very special kind of dough. It isn't hard to achieve, once you know what you're going for and why, but pie crust can still intimidate a lot of people.
What Makes Pie Crust Making Different Opposed To Making Other Doughs?
What makes a pie crust good and flaky is making sure you only coat the fat with flour, not blend them, as you would with a cookie dough. This is much easier to do if the fat is very cold. When adding liquid (and it could be water, egg, even a little vinegar) you don't want it to mix in, so much as collect all the flour-coated fat particles together and make them stick to one another. That's why less is better than more, and cold is better than warm. Colder and quicker are the watchwords with pie crust.
The Equipment
Using a Food Processor
Why use a food processor? Because the faster you mix the cold ingredients and the less you work it the better. Before electric appliances, butter was cut in using fingers, knives or a lovely little device called a pastry cutter.
A food processor is ideal for mixing fast, as long as you don't work it too much, then it gets warm. Try pulsing, not just letting it run. It is much faster than by hand, which has helped make my dough much more consistent.
Pie Crust Recipe
My recipe (most of the time) uses butter, not shortening. I'm very lazy and getting two sticks of butter out of the refrigerator is easier for me than fussing with measuring shortening. I use it for tarts as well, but you could use any recipe. A good friend (another Home Baker) uses a recipe that has an egg and a teaspoon of vinegar in it which also makes a very tasty crust. It also uses only shortening, which alot of people have gotten away from.
Butter makes a tasty dough. Shortening makes an especially flaky dough. A combination is always good. This kind of butter pie dough is called pâté brisée, which means "broken dough" in French--broken because of the way you cut the butter in, and the way it flakes. So now you have a new term to impress people with.
Double Pie Crust
Ingredients:
2 1/2 cups flour
1 teaspoon salt
1 teaspoon sugar
1 cup cold butter, cut in small pieces
1/4 cup shortening
6 to 8 tablespoons ice cold water
TIP: Chill your butter or shortening, and water. This is essential!!
Cut your fat into small pieces and add to your measured flour and salt (and sugar, if you use it). There is usually a little over twice as much flour as fat (by volume). Cut the fat in quickly, either with two knives, a pastry cutter or by pulsing in a food processor or blender. Your mixture should resemble coarse meal. Bigger lumps of fat are just fine; aim for pea-sized at biggest. (If you're using the Deluxe Butter Double Pie Crust Recipe, cut in the butter first, then cut in the shortening.)
Slowly add the water--just drizzle it in--and watch closely as you work it in with the edge of a spatula or continue pulsing. It should still look dry. Grab some with your hand and squeeze. Did it hold together? Than you have enough water. If it didn't, or you're not sure, add a little more water and mix quickly. Test again.
Divide the dough in half to make single crust amounts. Wrap the dough up by placing a portion of it on a piece of plastic wrap. Using the wrap, instead of your hands, push the dough into a flat disk. Refrigerate this for an hour or more. By making a flat disk at this point you make it a little easier to roll out. A round ball would be harder to get into a nice flat piece of rolled out pastry.
Even this amount of activity has activated the gluten in the wheat (great if you're making bread, not so great when you're making pie crust). And you want it to relax before you roll it out. It is even recommended that you let rolled-out dough relax before you bake it. I do this when I have time, or am prebaking a pie shell.
Sometimes dough gets too hard in the refrigerator. If this happens to you, let it warm up a little (15 or 20 minutes) on the counter before you roll it out.
Rolling Out The Dough
This is the part that just plain takes practice. I use a lightly floured board. I add little bits of flour as I go and turn the dough frequently and I work fast. Over time you learn how much pressure to apply and when to apply it. Putting the dough between waxed paper or plastic wrap will help avoid the sticking problem. This requires a certain amount of practice, too.
Begin by rolling from the middle of the disk up. Turn the dough one quarter and repeat. Always roll in one direction and turn the dough often. This also helps you avoid overworking the dough, you know, the old gluten thing again. That would create a tough pastry.
If the dough splits, just push it back together. It doesn't need to be perfectly round, just large enough to fit your pan. The recipe I have makes a generous amount and you don't need to worry about the edges, they just get cut off. In fact, the double crust recipe will make an additional single crust if I save all the scraps, which I have done on occasion.
Fitting The Dough Into The Pan
Now that you have your crust rolled out, bring your pie plate near your work surface, carefully fold the dough in half, pick it up and lay across the plate. [If you're using the wax paper method, carefully remove the top layer of paper, lie the dough on the pie plate and carefully remove the bottom layer of paper.
Open the dough up and gently work it into the plate. If it tears or splits, just pinch it together again, or use scraps to repair any holes. I probably still roll my dough out a little on the thick side because I want to prevent too much leakage with the fruit pies (it makes such a mess) and it is easier to crimp the edge if I have something to hold onto. Fortunately this crust is so tasty that even thick edges are delicious. Also, because it really is just my husband and I, the pie is apt to be around for a few days and I don't want the crust to get too soggy, something a very thin crust would do pretty quickly.
Crimping The Edges
Crimp the edges either with a fork or by pinching around the edge with your fingers. Your recipe may tell you to wait until you add the top crust for this step. If you're making a two-crust pie, roll out the second disk of dough in the same way and follow the recipe for your particular pie.
If I know I have some special pie baking experience ahead of me, I might make the dough the day before; then all I have to deal with is rolling out and filling the pie.
The Finished Pie
At this point, follow your specific pie recipe for filling and baking directions. Now, it's literally just a matter of practice, practice, practice, to make the perfect pie crust.
Freezing Pie and Tart Pastry
UNBAKED PASTRY:
Prepare regular pastry or crumb crust. Fit into pie pans. Generously prick pastry that will be baked unfilled. Stack pie pans with a double layer of freezer paper between them. Or, store flat rounds of pastry on foil-covered cardboard separated by two layers of freezer paper. Overwrap with freezer bags or heavy-duty aluminum foil, seal and freeze. Bake when pie shell is still frozen at 475 degrees F until light brown. Or, fill and bake as per recipe. Length of freezer storage: 6-8 weeks.
BAKED PASTRY:
Prepare and bake pastry as usual. Cool, package and freeze. Length of freezer storage: 2-3 months.
Defrosting Pastry
Defrost unbaked pastry in refrigerator, then bring to room temperature before handling.
Glaze for Fruit Pies and Tarts
You can make a clear glaze to brush over your open-topped fruit pies and tarts after baking to give the fruit a nice shiny look.
Clear Glaze
Ingredients
1/2 cup granulated sugar
1 cup water or fruit juice (such as clear apple juice)
2 tbsp. corn starch
2 tbsp. corn syrup
Instructions
Bring sugar to a boil with half of the water or fruit juice. Dissolve cornstarch in the other half of water or fruit juice and add to the sugar mixture. Cook, stirring until mixture thickens and clears. Stir in corn syrup. Bring to a boil then remove from heat. Cool before brushing over the top of fruit.
Another Glaze Option
The glaze on most fruit tarts is simply jelly that is melted and allowed to set up once it has been brushed on. Strawberry or currant jelly gives fruit toppings a rosy blush as well as a sparkling finish. If you don't want the rosy tone, use a peach or apricot jelly. Using a pastry brush, brush glaze over fruit to edge of pastry.